

Have you been commissioned for a pearls photoshoot but don't feel up to the task? Your fears and concerns are not unfounded. Photographing a single pearl or pearl jewelry is intimidating for a good reason, and even long-time professionals struggle to reach perfection.
Here's everything you need to know about the unique characteristics of pearl photography and the tricks that help overcome the challenges they pose. Let's take a good look.
In this article
-
- Use a Minimal Number of Lighting Sources for Pearl Photography
- Position the Lighting at a Slight Angle of 1.5 Meters Above the Pearls
- Use White Cards to Soften Shadows and Give Light to the Pearls
- Try Shooting in a Lightbox in a Completely Dark Room
- Shoot in Raw for Better Post-Processing Results
- Take the Time to Style the Pearls
The Unique Characteristics of Pearl Photography
Have you ever done product photography before, or will this be your first time? Those who have, know that this particular type of craft is among the trickier out there. And if you think product photography is a challenge to master, wait until you've tried photographing jewelry.
Enter pearl, the most extraordinary, unique, and breathtaking jewelry gemstone in the world.
Why is pearl photography so difficult? If you have a piece of pearl jewelry in your household, take it in your hands and observe what happens as you move it around. Magnificent, right?
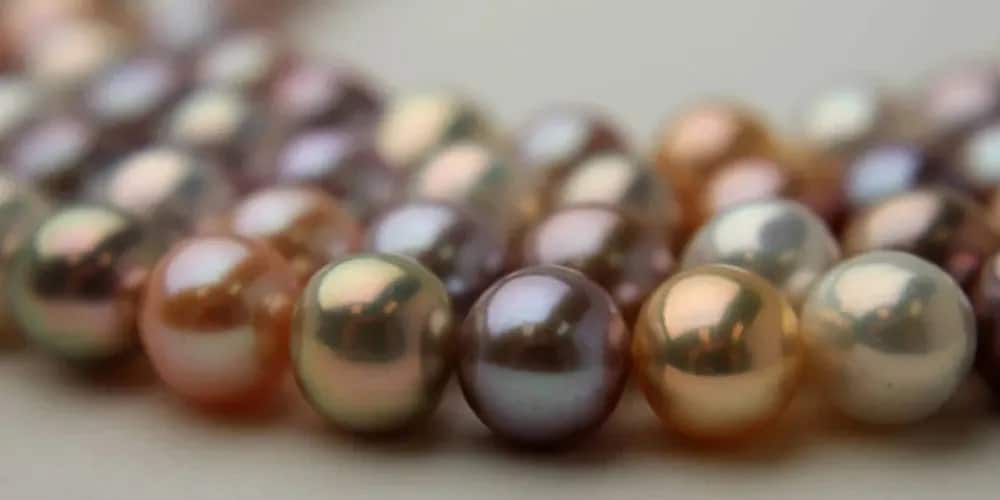
Fine jewelry is made with high-quality pearls with a smooth surface and silky texture. However, a pearl's most distinctive quality is the phenomenon called “luster.” Luminous luster is a unique ability to reflect and refract light, which gives recognizable beauty and radiant glow to every pearl.
As you can guess, this magical reflective property makes pearl photography a true challenge. Sadly, there is no guidebook for photographing pearls. The pearl commands attention. It wants you to look at it, admire its beauty, and study its unique qualities.
Useful Ideas & Tips for Pearl Photography
Did you know that pearls are the only gemstones shaped and polished entirely by nature? A perfect pearl needs no human intervention. The many challenges of pearl photography reflect that elusive nature. Don't get easily disheartened by them. You can tame a pearl.
If you've been commissioned to do a pearl photoshoot or if this is something you'd like to master for your portfolio, you should start practicing today. The good news is that you don't need much in terms of camera and equipment. However, you do need to perfect a couple of tricks.
Here's how to photograph a pearl for a perfect product image:
1. Use a Minimal Number of Lighting Sources for Pearl Photography
While product photography allows you to use many different types of lighting from natural and artificial sources, pearl photography is unique in this respect.
You'll want to use minimal lighting sources for a typical pearl photoshoot. Ideally, you should have a studio room with a strobe and a reflector. A single strobe will do the trick.
Can you photograph pearls in natural lighting? Technically, the answer is yes. However, you must prepare yourself (and everyone else involved in the process) for long hours experimenting with many different environmental settings, camera configurations, and lighting setups.
2. Position the Lighting at a Slight Angle of 1.5 Meters Above the Pearls
Earlier, we mentioned that there is no guidebook for photographing pearls. Fortunately, there's one exception that can help you avoid shooting in the dark. According to professionals, you should always position the lighting about 1.5-2 meters above the pearls, slightly at an angle.
3. Use White Cards to Soften Shadows and Give Light to the Pearls
While too little light can make pearls appear a bit lackluster, too much of it can make them look fake or suspiciously plastic. As a photographer, you need to be careful about things like this and treat your pearl jewelry with the proper amount of lighting and the right type of direction.
You'll need a white background or cards and foam boards to capture a pearl's natural color. It will help you avoid long shadows and “hot spots” from too much lighting.
4. Try Shooting in a Lightbox in a Completely Dark Room
Successful product photographers take the time to study and understand their subjects. That's especially important when you're photographing pearl jewelry. Even though pearls look alike, they differ in quality, density, and luster, all of which affect how they reflect light.
High-quality pearls have an intense, luminous luster that resembles a mirror. That can make light bounce around the room and change the natural appearance of the pearls.
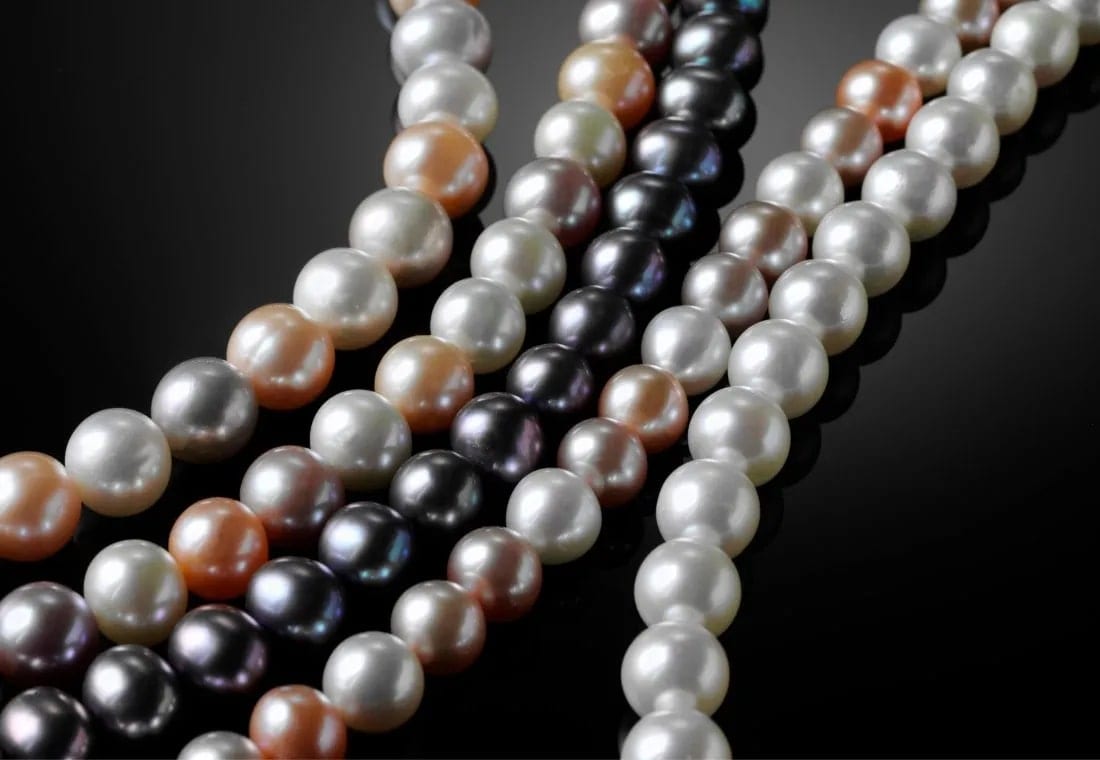
Here's a quick experiment to see what we're talking about. If you take a pearl necklace outside and put it against tree leaves under direct sunlight, the pearls will appear green.
To avoid this, you should always photograph pearls in a controlled studio environment with black walls and no natural light sources. In addition to that, you should practice using White Balance in your camera. This setting helps the camera establish the true color of white.
5. Shoot in Raw for Better Post-Processing Results
For those who do not know, RAW is a file format, like JPG, that captures all image data recorded by your camera. Unlike JPG, RAW is the most detailed file format for photography. It allows you to make high-resolution images of unmatched quality and get professional prints.
Another reason you should use RAW when photographing pearls is that it enables easier editing. It carries more information about the image, which you can correct and manipulate without losing any of the photograph's original quality. That's not the case with JPG or JPEG.
6. Take the Time to Style the Pearls
Product photography is all about impeccable technique, but that's not the only aspect affecting the quality and beauty of the end result. Product styling is just as important.
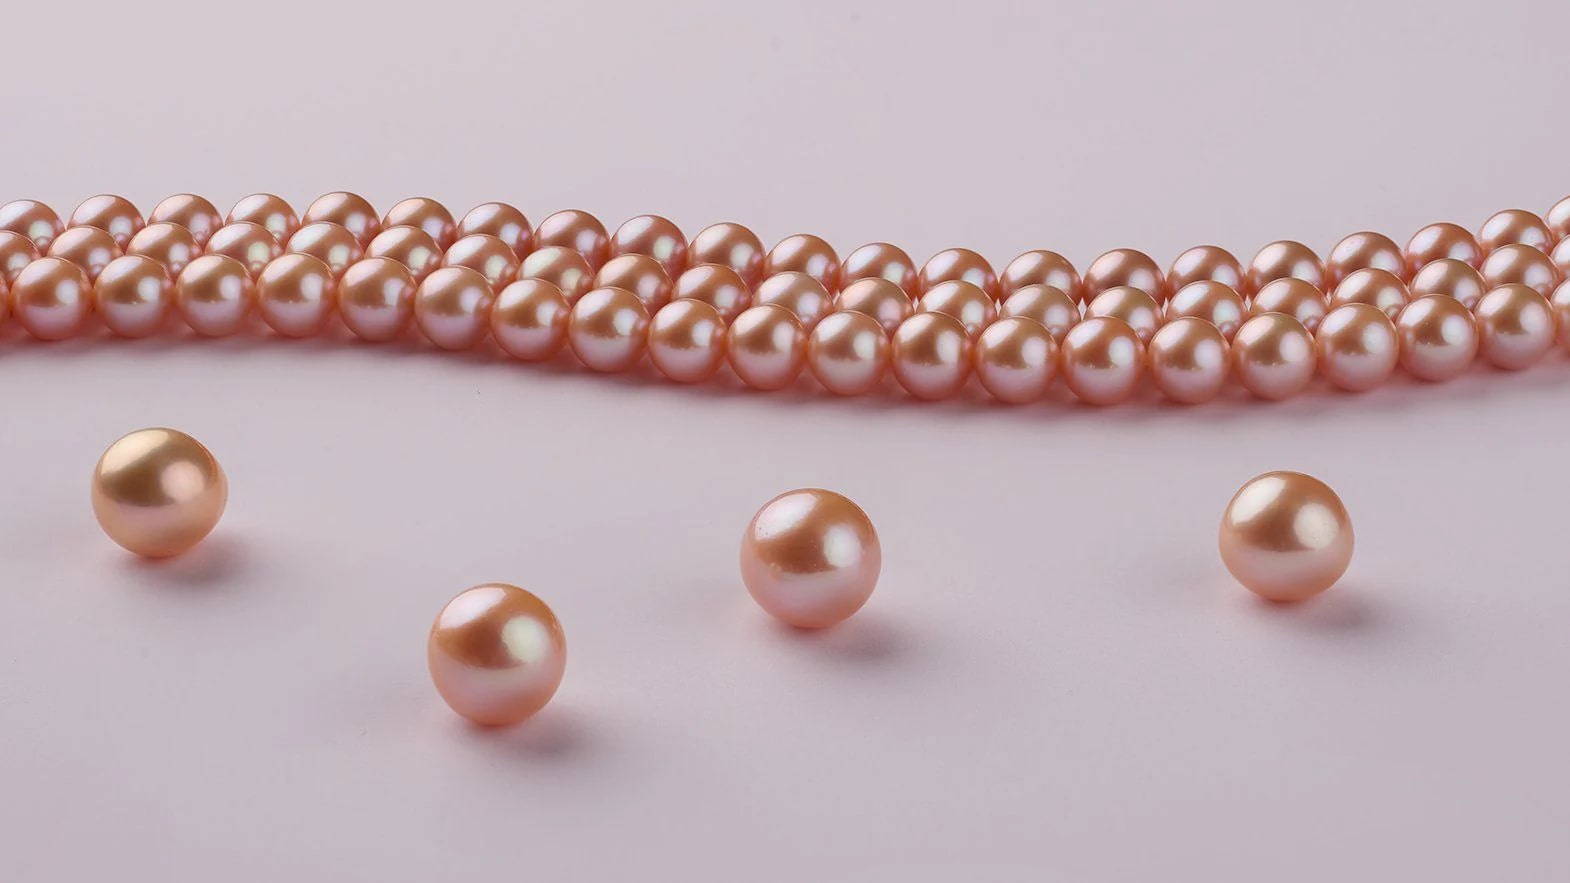
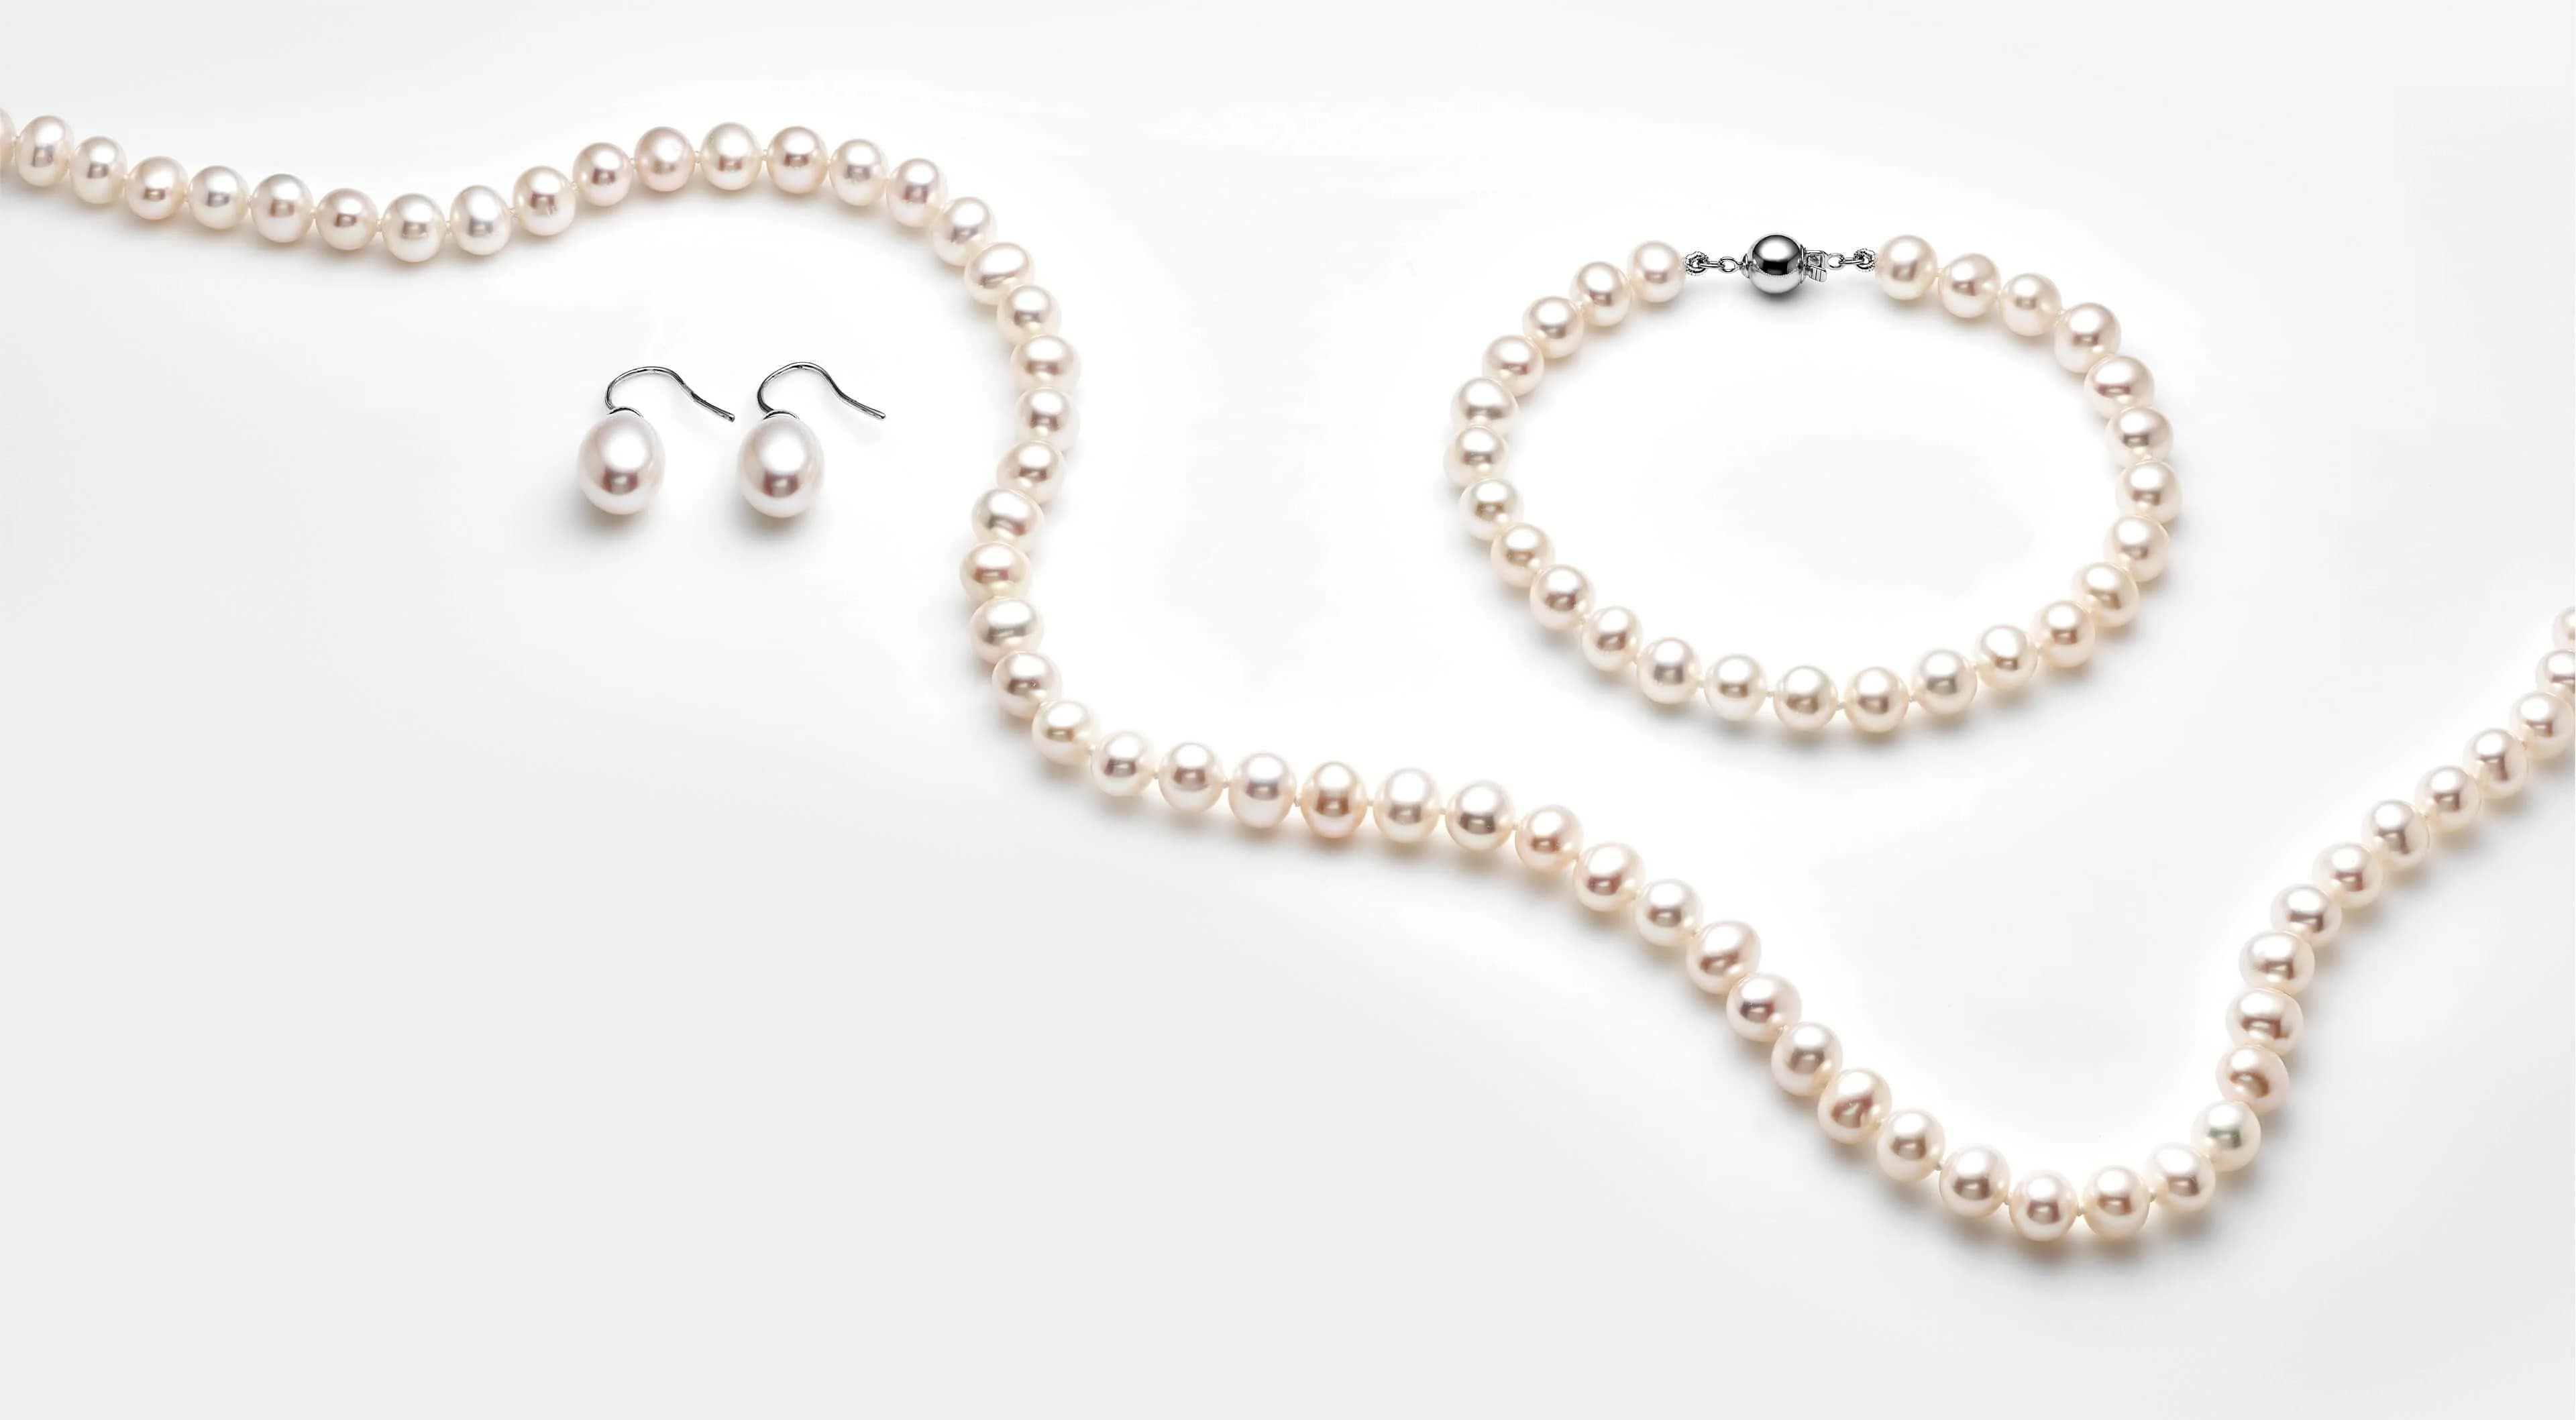
Many photographers prefer to photograph pearls in the so-called “lemniscate” position, which shows pearls in an old-school figure-eight shape. Is this a must-have for your portfolio? Yes, because most of your clients will ask for it. Can you try out other styling tricks? Absolutely!
Don't Forget to Edit Your Pearl Photos Like a Pro
While it is possible to capture the natural beauty of pearls using photographic trickery, a professional is rarely satisfied with the first results. There's always some kind of imperfection poking the artistic eye, be that a slight discoloration, a speck of dust, or an awkward shadow.
That's why Photoshop has become as essential for photography as the camera. If you don't know how to use it, you should definitely consider taking a course.
Can you avoid learning Photoshop? Ultimately, that depends on your aspirations as a photographer. If you're fine with doing small DIY projects for your brand's social media page, you can probably get away with a good AI-powered photo editor with auto-scene detection.
[NEW TREND] Generate Pearl Product Photos Using AI
Right now, you're probably feeling a bit overwhelmed. That's perfectly okay.
As a beginner, you will get scared of everything you don't know. That's bound to happen, so don't stress about it. The important thing is to keep trying and experimenting with different techniques and camera settings. The only way to reach perfection is through trial and error.
You don't want to become a professional photographer, but you need professional-looking pics to market your pearl brand on a budget? There's a much quicker solution for that!
Meet AI for product photography. This popular trend is everywhere, and here's why.
Since the commercial release of OpenAI's chatbot and the proliferation of artificial intelligence in our everyday lives, professional photographers have been welcoming AI into studios and editing rooms. There are literally thousands of AI camera apps and photo editing apps.
One of the best AI tools for product and jewelry photography is Wondershare VirtuLook.
Wondershare VirtuLook allows you to generate pearl photography from scratch using only basic pics. As you can see below, this tool lets you direct the composition, atmosphere, and type of photography. You can choose a background, pick a desired lighting, and add models or props.
Here's what making product photography with Wondershare VirtuLook looks like in a few steps:
Step 1. Sign up a free account by clicking the above "Try It Free" button.
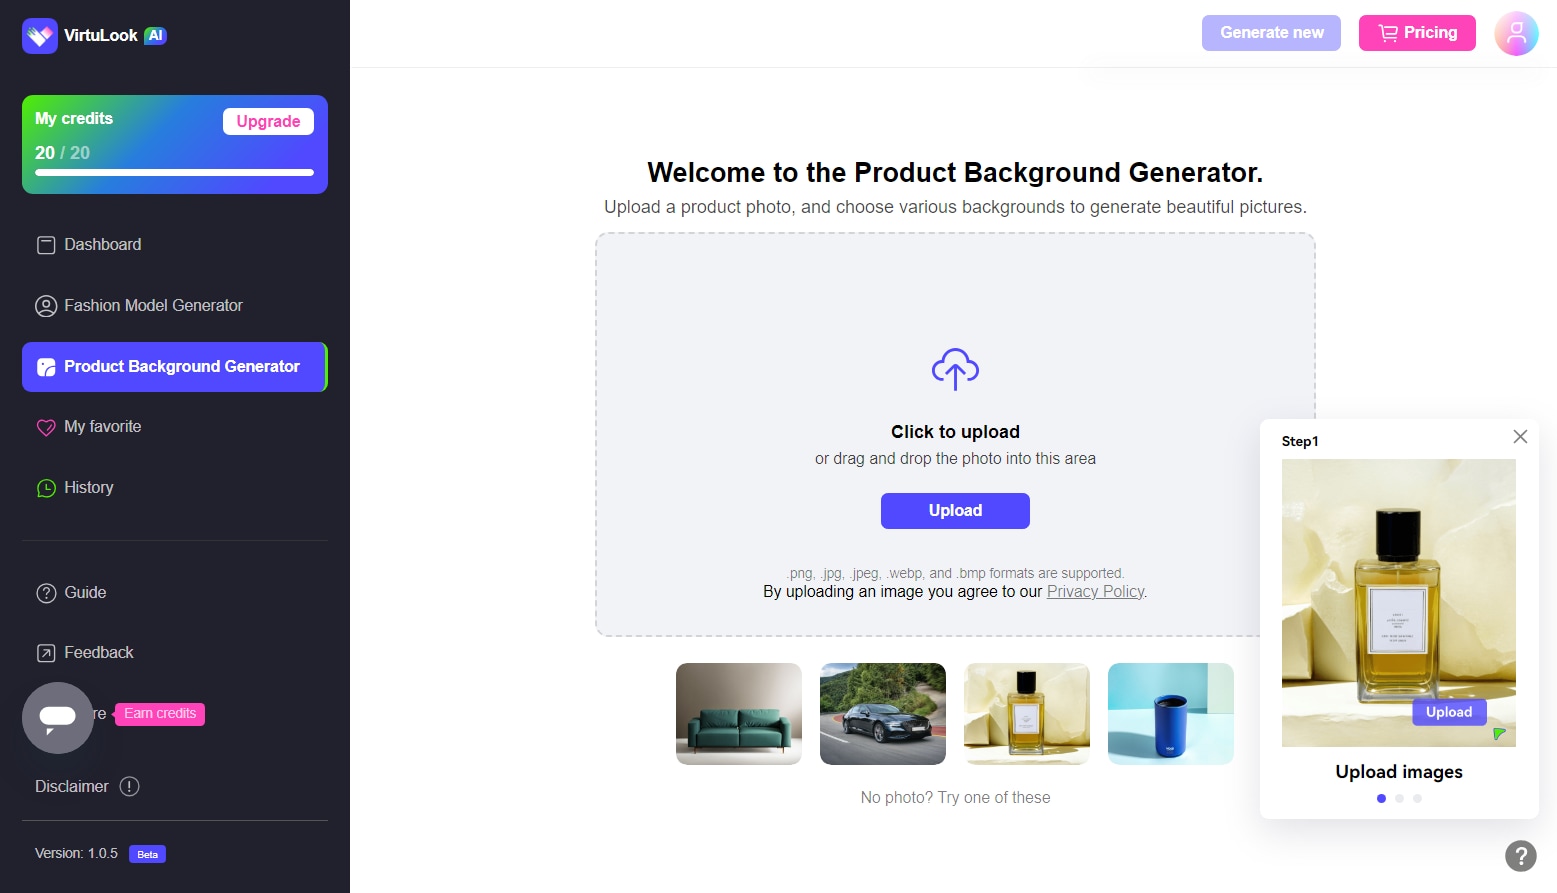
Step 2. Upload your original pearl images. For an optimal output, it's recommended to review the basic requirements for the original photos first.
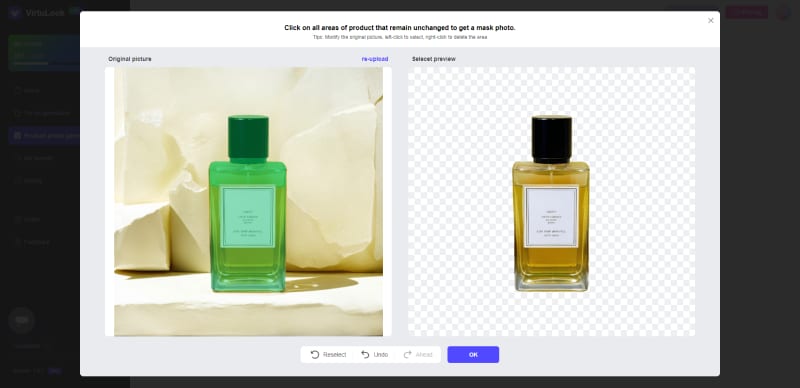
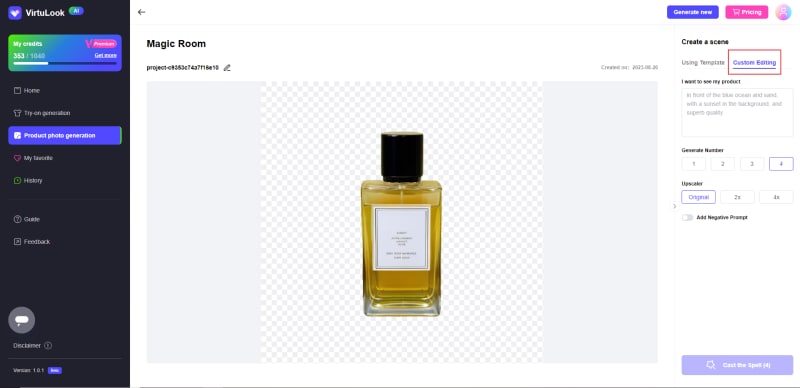
Step 3. Now, you can change your background by Using Template/Custom Editing. Change the style and background by selecting the different template.
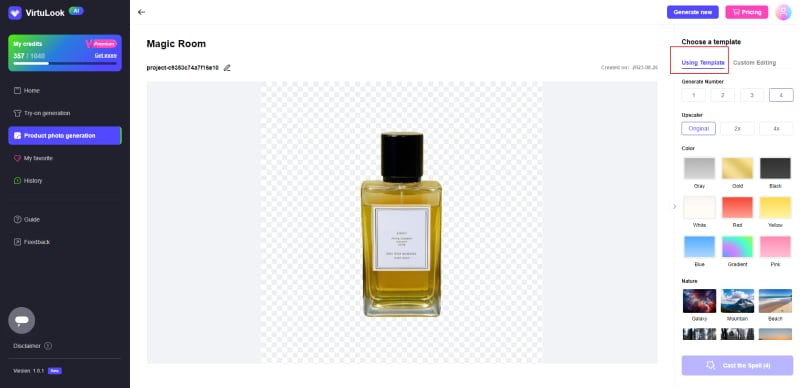
If the template does not include the scene you require, consider using the Custom Editing feature to create your own personalized photo.
Step 4. Finally, download or save the photos you find appealing.
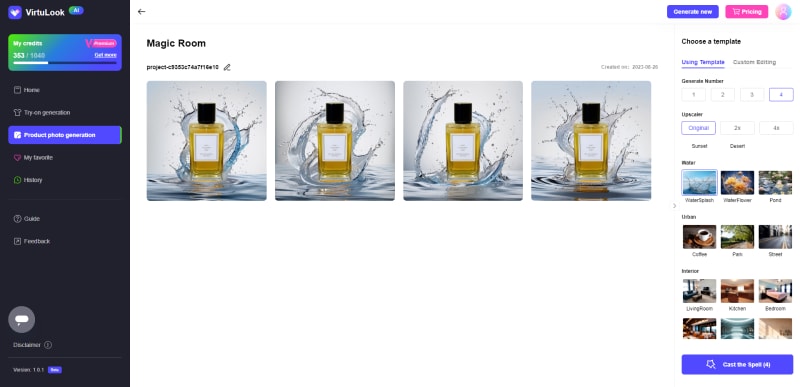
It's a fantastic option for amateurs, beginners, and professionals in a rush. Wondershare VirtuLook requires no technical knowledge whatsoever and still provides stunning custom photography.
Conclusion
Pearl jewelry photography takes work. The pearl's beauty is elusive and difficult to reduce to only two dimensions. It's all due to this gemstone's unique reflective properties that require a special lighting setup and delicate camera settings that many photographers never master.
To photograph pearls like a professional, you must start practicing now. Use Wondershare VirtuLook for inspiration until your skills improve, and you begin achieving the desired results.