
Professional photography is about learning how to highlight essential features and accentuate the atmosphere. It’s about focusing on a specific subject to emphasize its importance and create a visual story. Blurring the background in Photoshop is one of the best methods to achieve excellence.
However, Photoshop is more complex for beginners, making the blurring process daunting. If you want to master this skill, we have prepared a detailed guide below. Read through for an additional tip to boost your productivity and make the background blurring process a piece of cake.
Different Methods for Selecting Image Backgrounds in Photoshop
Before jumping into the blurring, you should first select the background you want to edit. Photoshop offers multiple solutions, and we will present some of them below. You can choose the one that fits your workflow best.
In this article
Selecting a Background Using Lasso
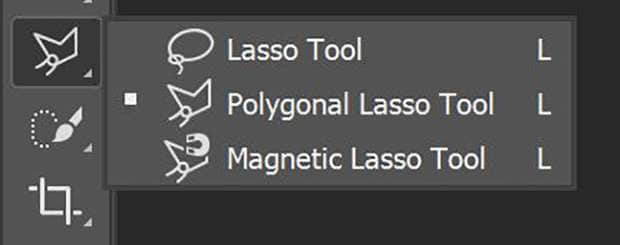
Lasso is one of Photoshop’s tools that allows you to select the area you want to edit. It includes manual selection, and you can use one of the three options Lasso offers: basic, polygonal, and magnetic, depending on your needs and selection accuracy.
The Lasso tool is perfect for blurring backgrounds in Photoshop surrounded by irregular objects and subjects. For instance, if you have taken a portrait image of someone, Lasso may be your ideal selection tool since you can work around fine, minor details. It gives some of the most precise selection results.
Selecting a Background Using Quick Mask
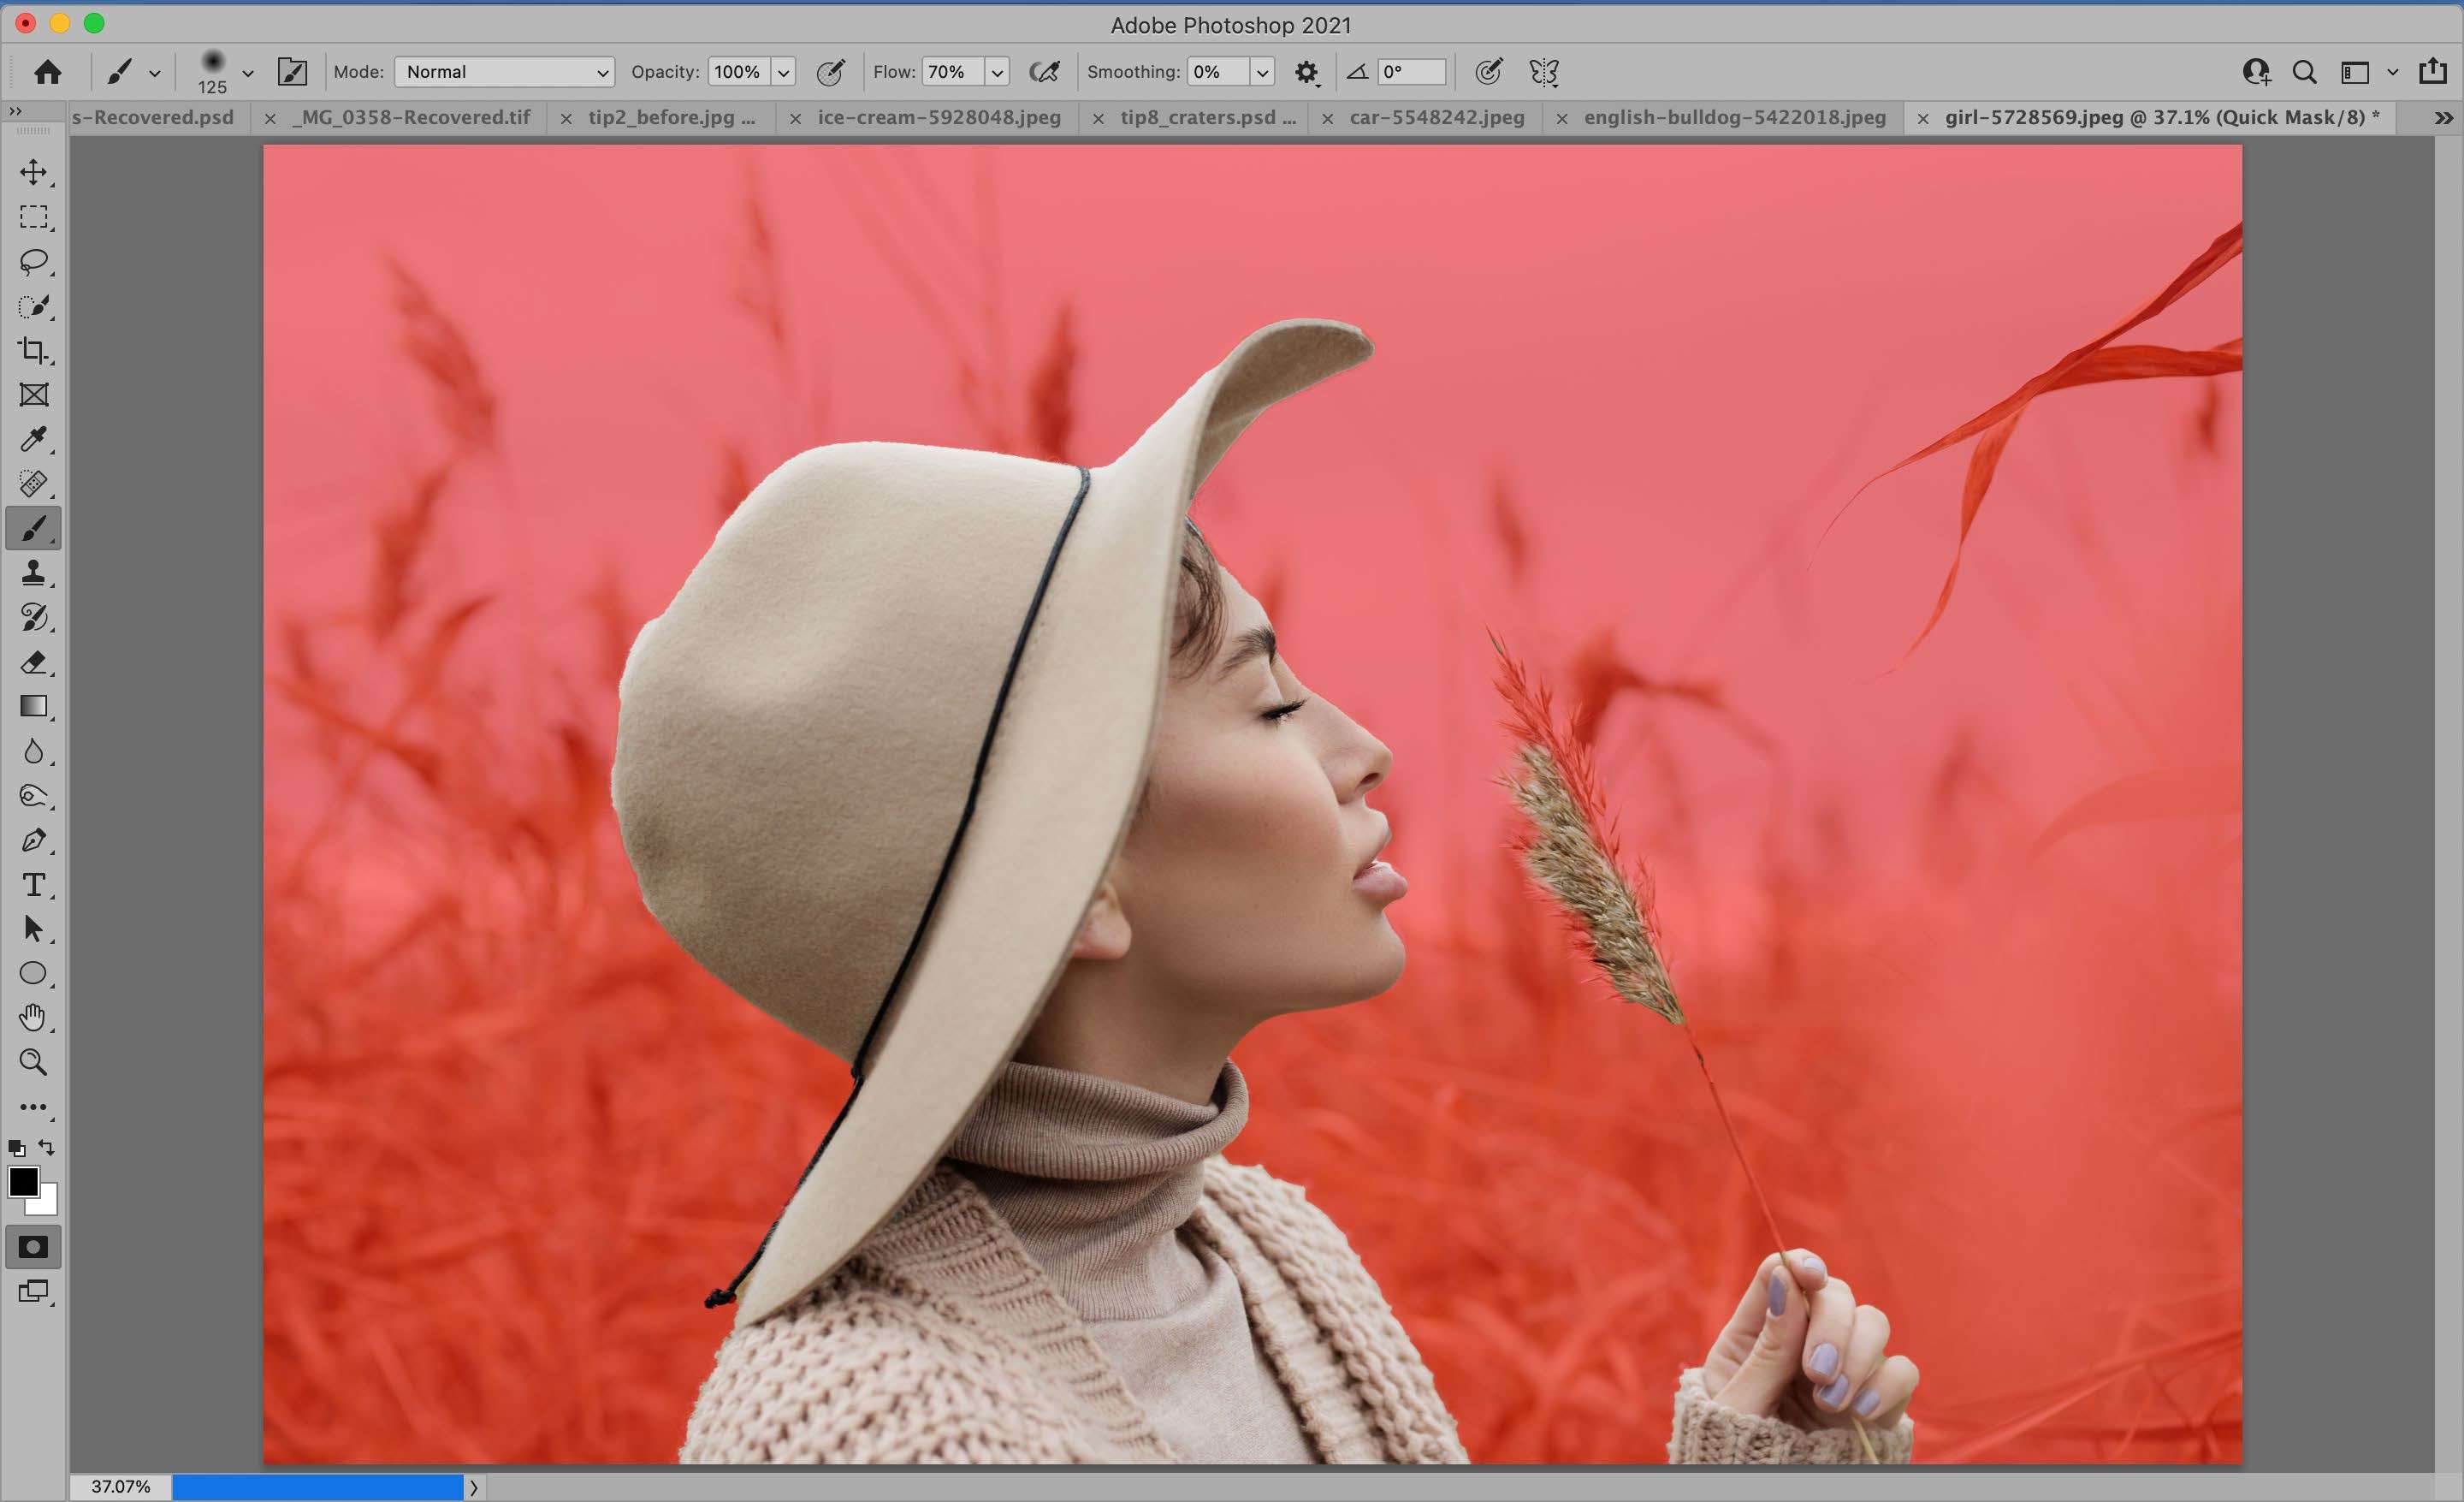
Quick Mask is another tool Photoshop offers for precise background selection. It uses a red overlay that lets you instantly edit your images without changing the original photograph. It’s perfect for detailed images and is one of the most precise Photoshop selection tools.
When you turn Quick Mask on, the image will instantly become red, indicating unselected areas. You should select your background (it shouldn’t have a red overlay) and then use some of the tools to modify your images. It is perfect if you need an all-in-one tool for easy background blurring.
Selecting a Background Using Magic Wand
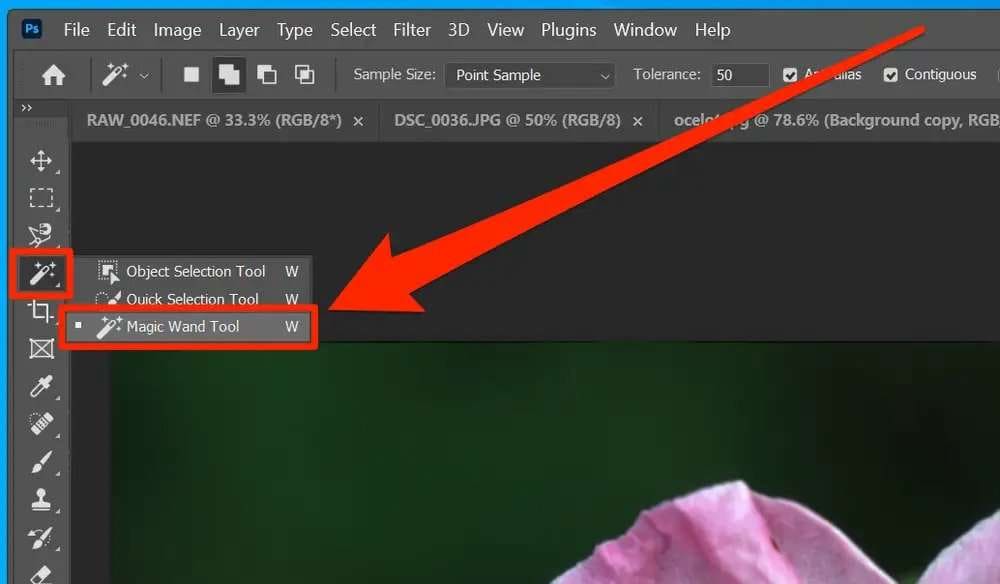
Magic Wand is one of the most advanced Photoshop tools enabling you to select your background quickly. It recognizes similar colors and tones and selects pixels with similar specifications. That makes it excellent for choosing more significant parts of an image, such as a background.
However, it may not be as precise as Quick Mask since you may find similarly colored pixels in the object that you want to put into focus. Therefore, pair it with other tools for the best results and accurate selection.
The Process of Blurring a Background in Photoshop
Once you determine the ideal selection method for your needs, you can head over to the blurring process. As mentioned, Photoshop is a complex tool, so we have prepared a step-by-step guide to blurring the background using Photoshop.
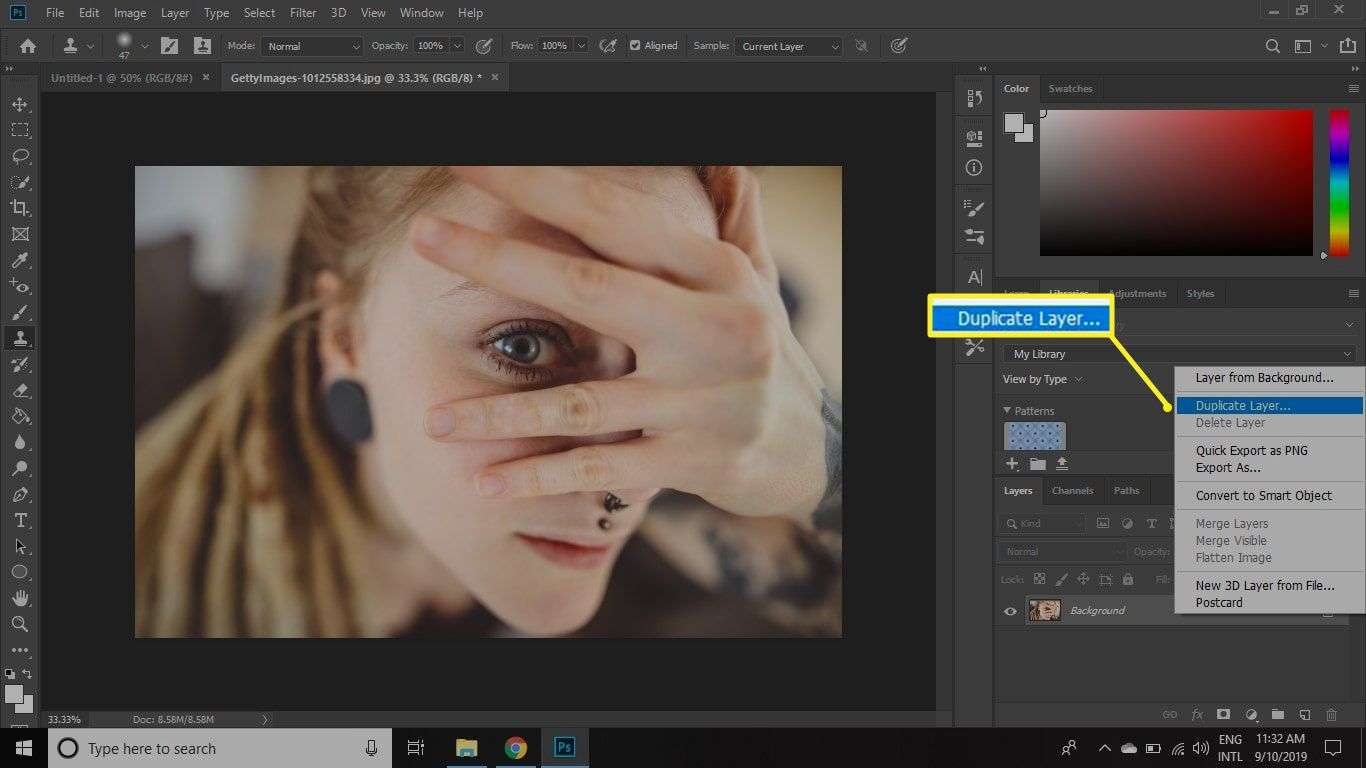
1. Duplicating the Background Layer
Before blurring the background in Photoshop, duplicate the background layer to avoid damage. It will serve as a protective layer, ensuring you can always correct your mistakes and return to your original images.
Moreover, you will have better control over your images and easily adjust the blurring opacity to create the best works of art. This part is essential before any editing journey, so you should have a copy whenever you start working on your images.
To duplicate your background layer, right-click the layer in the Layer section in Photoshop and select Duplicate Layer.
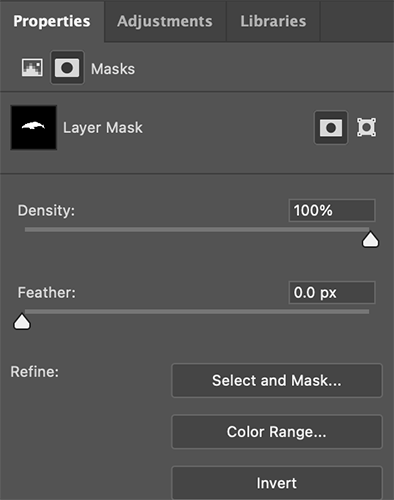
2. Masking the Subject
Masking the subject allows you to control which elements the changes will influence and which will be unedited. This method will ensure that the primary subject in your image stays sharp and accentuated while you blur the rest of the photo.
Additionally, the masking tool allows you to precisely refine the edges around the subject and create a smooth transition between the blurred and not blurred pixels. This customizable step will take your images to the next level.
To use this tool, you should first select the subject you want to mask by utilizing some of the above methods. Once you do, find the Select and Mask feature in the toolbar or the menu. Then, preserve the edits by using the Add Layer Mask from the Layers option.
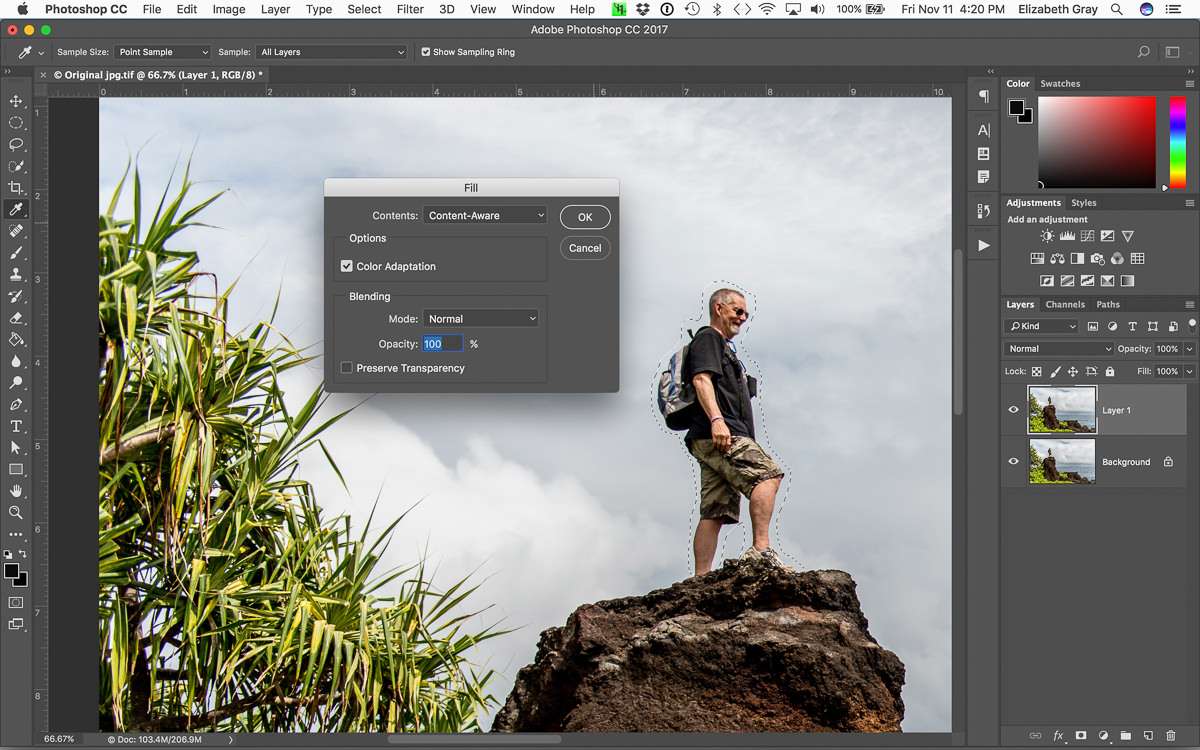
3. Filling the Background Layer
Filling the background layer of your image ensures the best workflow and consistent results. Before blurring the background, you can preset the colors, hues, saturation, and other elements. This method will give you the best results and make your images look elevated.
Moreover, filling the background layer will ensure no flaws during the blurring process. If you fill in the original layer, you won’t have patchy, inconsistent images.
To fill the background layer, select your layer and head to the Edit section. Choose the Fill option from this toolset and select the type of fill you need to make your images picture-perfect.
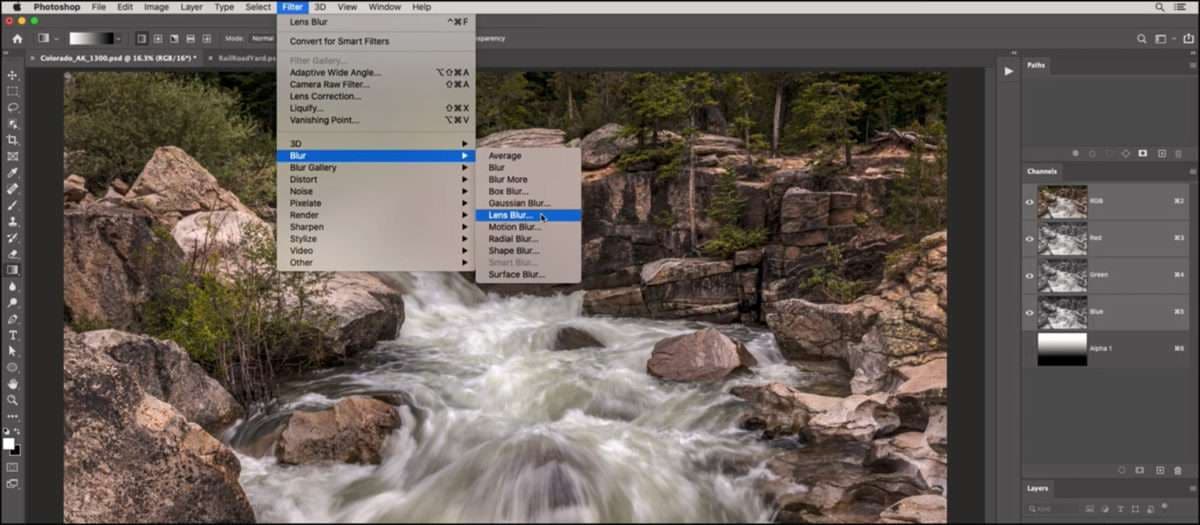
4. Blurring
Once you ensure that the blurring will be consistent and precise and won’t permanently damage the original image, you can start the blurring process in Photoshop. However, always double-check the elements above to ensure the best experience.
After checking everything, select your background duplicated layer and head to the Filter section. You will find the Blur option to choose and apply to the background layer. Several blurring options available with this advanced tool, as you’ll see below.
5. Masking
After blurring the background, you should again use the masking option to check for missed spots or mistakes. You can use the masking tool to refine the details and get precise results. This step is essential if you are working with images with many details, such as hair and fine lines, to ensure you work around such small elements.
This step may be the most time-consuming since you must check all the spots before you finish editing your images. Still, it is worth the time since it can make the most significant difference in the visual representation of your art.
Types of Background Blur Options in Photoshop
Photoshop has developed several blurring options to make this experience more efficient and less time-consuming. You can choose the one that will fit your needs or experiment with different elements to discover the most suitable solution. Here are the options Photoshop offers regarding the blurring process.
Iris
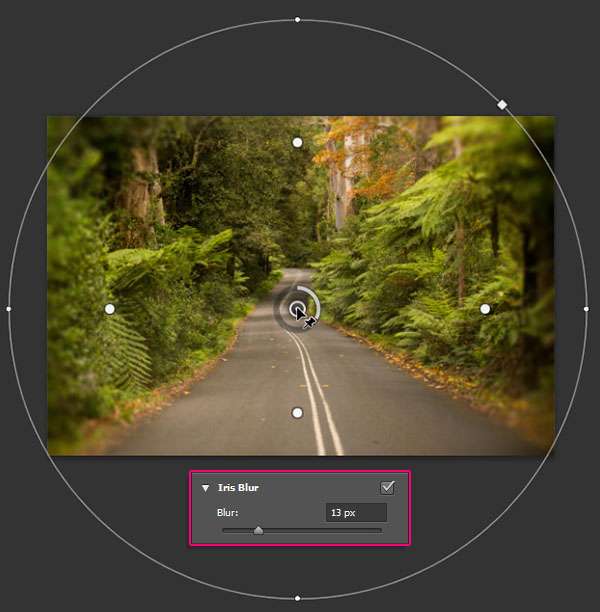
The Iris option in Photoshop can create a blurring effect similar to looking at the subject in real life. It imitates the human iris’s capabilities and is responsible for creating realistic images. Iris has a gradual blur in a circular shape that resembles the human iris. The focused part is small and gradually blurs away from the main subject.
If you want the most realistic, real-time results, you can opt for this option in your Photoshop program. Head over to the Filter option, select the Blurring Gallery, and find Iris Blur that you can apply to your image. To customize the results, you can adjust the opacity, transition, shape, and other elements.
Tilt-Shift
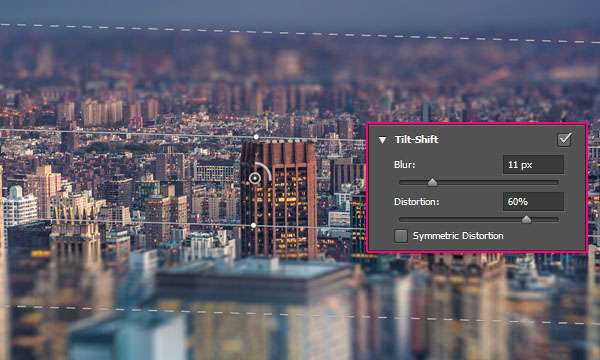
The tilt-shift blurring option can make your images look entertaining, vibrant, and fun. This effect deals with depth and creates an illusion of smaller, closer objects. Therefore, use it to trick your viewers and make some of the most interactive pictures.
You can also find this blurring method in the Blurring Gallery in Photoshop. Select the Tilt-Shift feature and experiment with angles, opacity, and other elements to accentuate the atmosphere and create modern, entertaining environments.
Gaussian
The Gaussian option creates elegant, sophisticated, and soft images. It consists of a bell-like curve you can find in numerous cultural buildings and can accentuate the sophistication of your pictures. With the help of proper filters and editing, you can create dreamy and gloomy atmospheres. Moreover, it is one of the most customizable options on the Photoshop platform.
Like the options above, you can find this blur in the Blurring Gallery and customize its elements according to your preferences. You can combine it with other blurs to create a modern yet soft look or experiment with different effects to accentuate your style.

Bokeh
Bokeh is one of the dreamiest, most romantic blurring options you can find in Photoshop. It allows you to blur the lights and create different shapes to tell a story behind your images. If you are looking for a soft yet fantastic design that will accentuate the main subject, you should use this option for your next project.
You can also combine it with other options to elevate the look and tell a story behind your art. Experiment with blurring effects, and you will find the one that fits your niche best.

How to Create the Exact Images You Need Without Editing
Since technology has advanced over the past few years, we no longer need advanced, complex tools to create the most striking images. We can do it in a few clicks and avoid time-consuming, daunting editing options.
One of the best methods to achieve a professional look is using artificial intelligence tools, such as Wondershare VirtuLook, to remove and blur backgrounds, add new elements, and transform your experience.
You will never go back once you see how easy it is to use such tools. You can try out Wondershare VirtuLook to experience the world of advanced editing. Here’s how to start your AI journey:
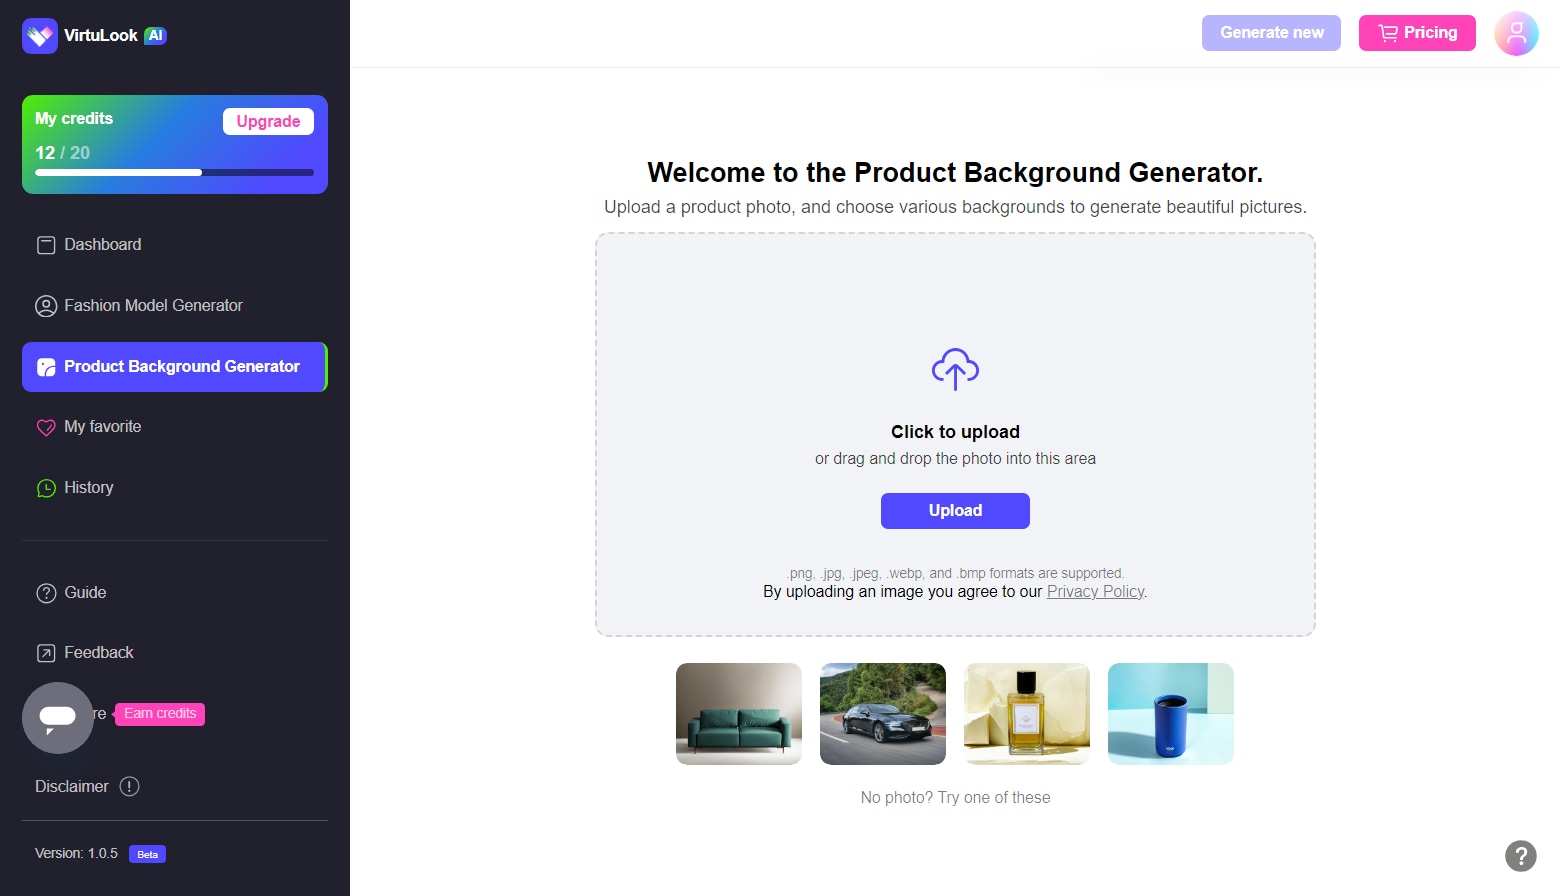
- Step 1: Visit Wondershare VirtuLook and create an account.

- Step 2: Click the Product Photo Generation option on the left side and then Upload the original image.
- Step 3: Choose the desired scene for product image.

- Step 4: Input your preferences and scenery and click Cast the Spell.
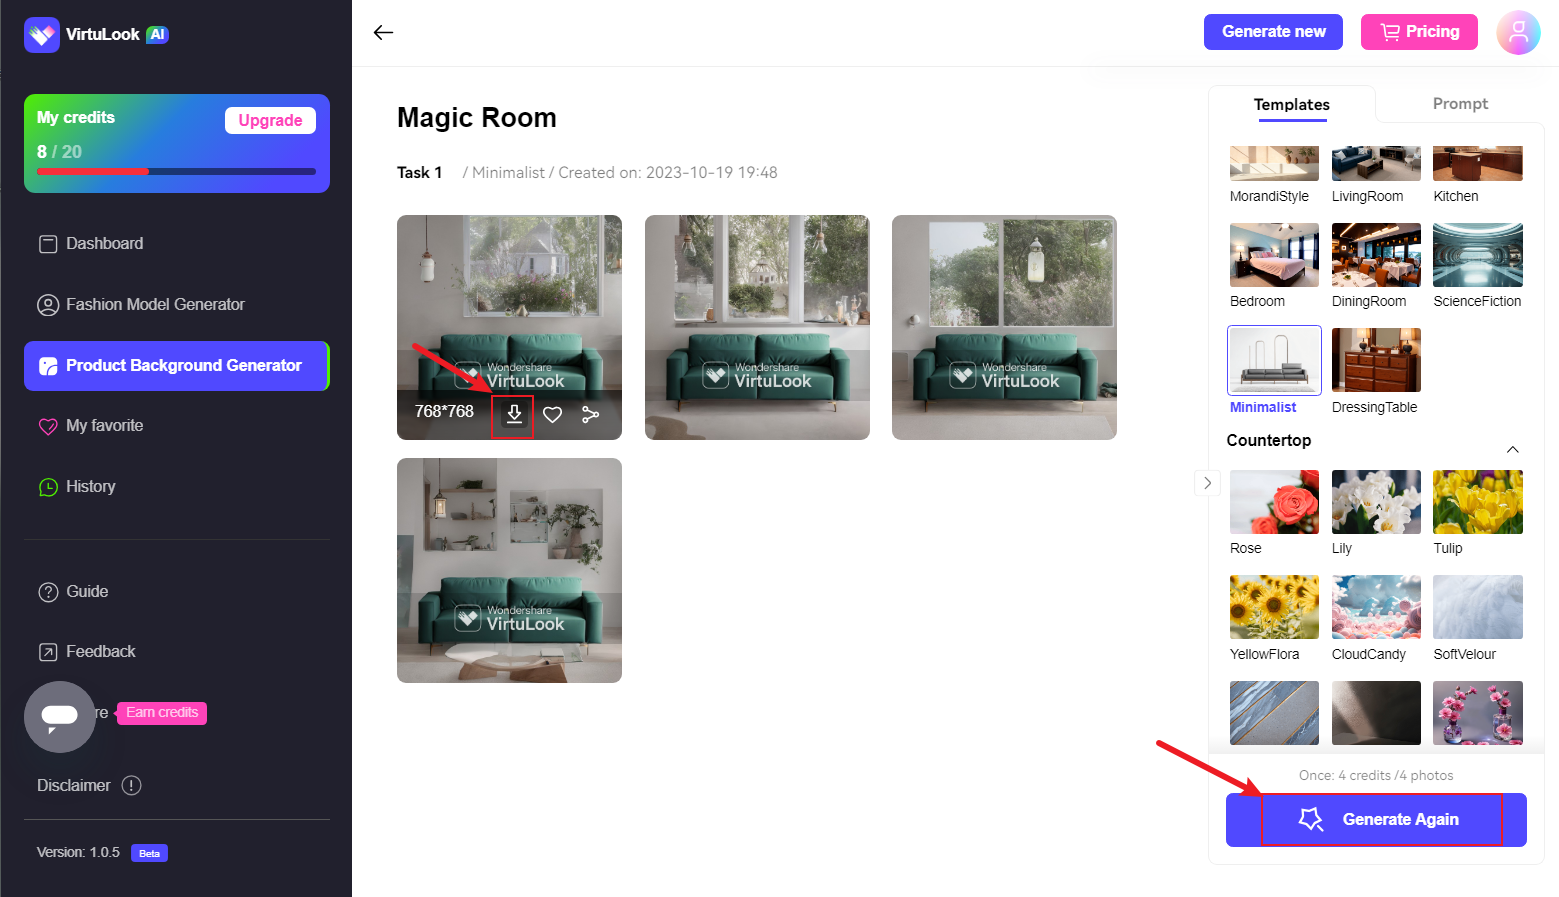
After a few moments, you will have new, transformed images in 4K.
Conclusion
Blurring the background in your images can accentuate the main subject and create a professional look. If you are new to the industry and need help navigating Photoshop, our step-by-step guide is your go-to resource for the best blurring experience.
It addresses the steps before blurring the background and the options to elevate your photos’ look. Additionally, it introduces an alternative to this time-consuming task to help you climb the competitive ladder and produce the best, most professional images on the market.