
If you have any experience with Adobe Illustrator, you know how valuable of an application this program is. It’s one of the leading vector drawing programs on the market. Adobe Illustrator has been present for almost 40 years. It has been setting industry standards since then.
In most cases, you’ll have to adjust or remove the image backgrounds. Instead of wasting time and effort with Photoshop, you can easily remove logos or white backgrounds with the built-in Adobe Illustrator background remover. Read on to find out how.
In this article
Why Remove the Background Using Adobe Illustrator
If you take a look at the latest statistics, you’ll notice that modern-day online consumers demand impeccable visuals to make purchasing decisions. If your images contain harsh light, unwanted objects, or any other background element that could temper their user experience, they’ll look for what they need elsewhere.
These minor imperfections distract the viewer’s attention. That’s why you should consider removing the background from your images using Adobe Illustrator.
Doing so offers a few benefits:
- You can improve your images – Adobe Illustrator background remover allows you to improve upon your photography by eliminating distractions, unnecessary objects, and imperfections from your photos.
- Preparing images for special edits – removing background from your photos allows you to add up special edits and improvements, like reflections and shadows.
- Making color adjustments – some images look more pleasing with a transparent background. Adobe Illustrator background remover helps you change the background of your image for strictly aesthetic purposes.
- Adding more items to your images – removing background from images allows you to add more elements to your photography. For example, removing a background allows adding any object to a photo without making the edit look artificial.
How to Remove Background in Adobe Illustrator
Here are the top three methods to remove background in Adobe Illustrator.
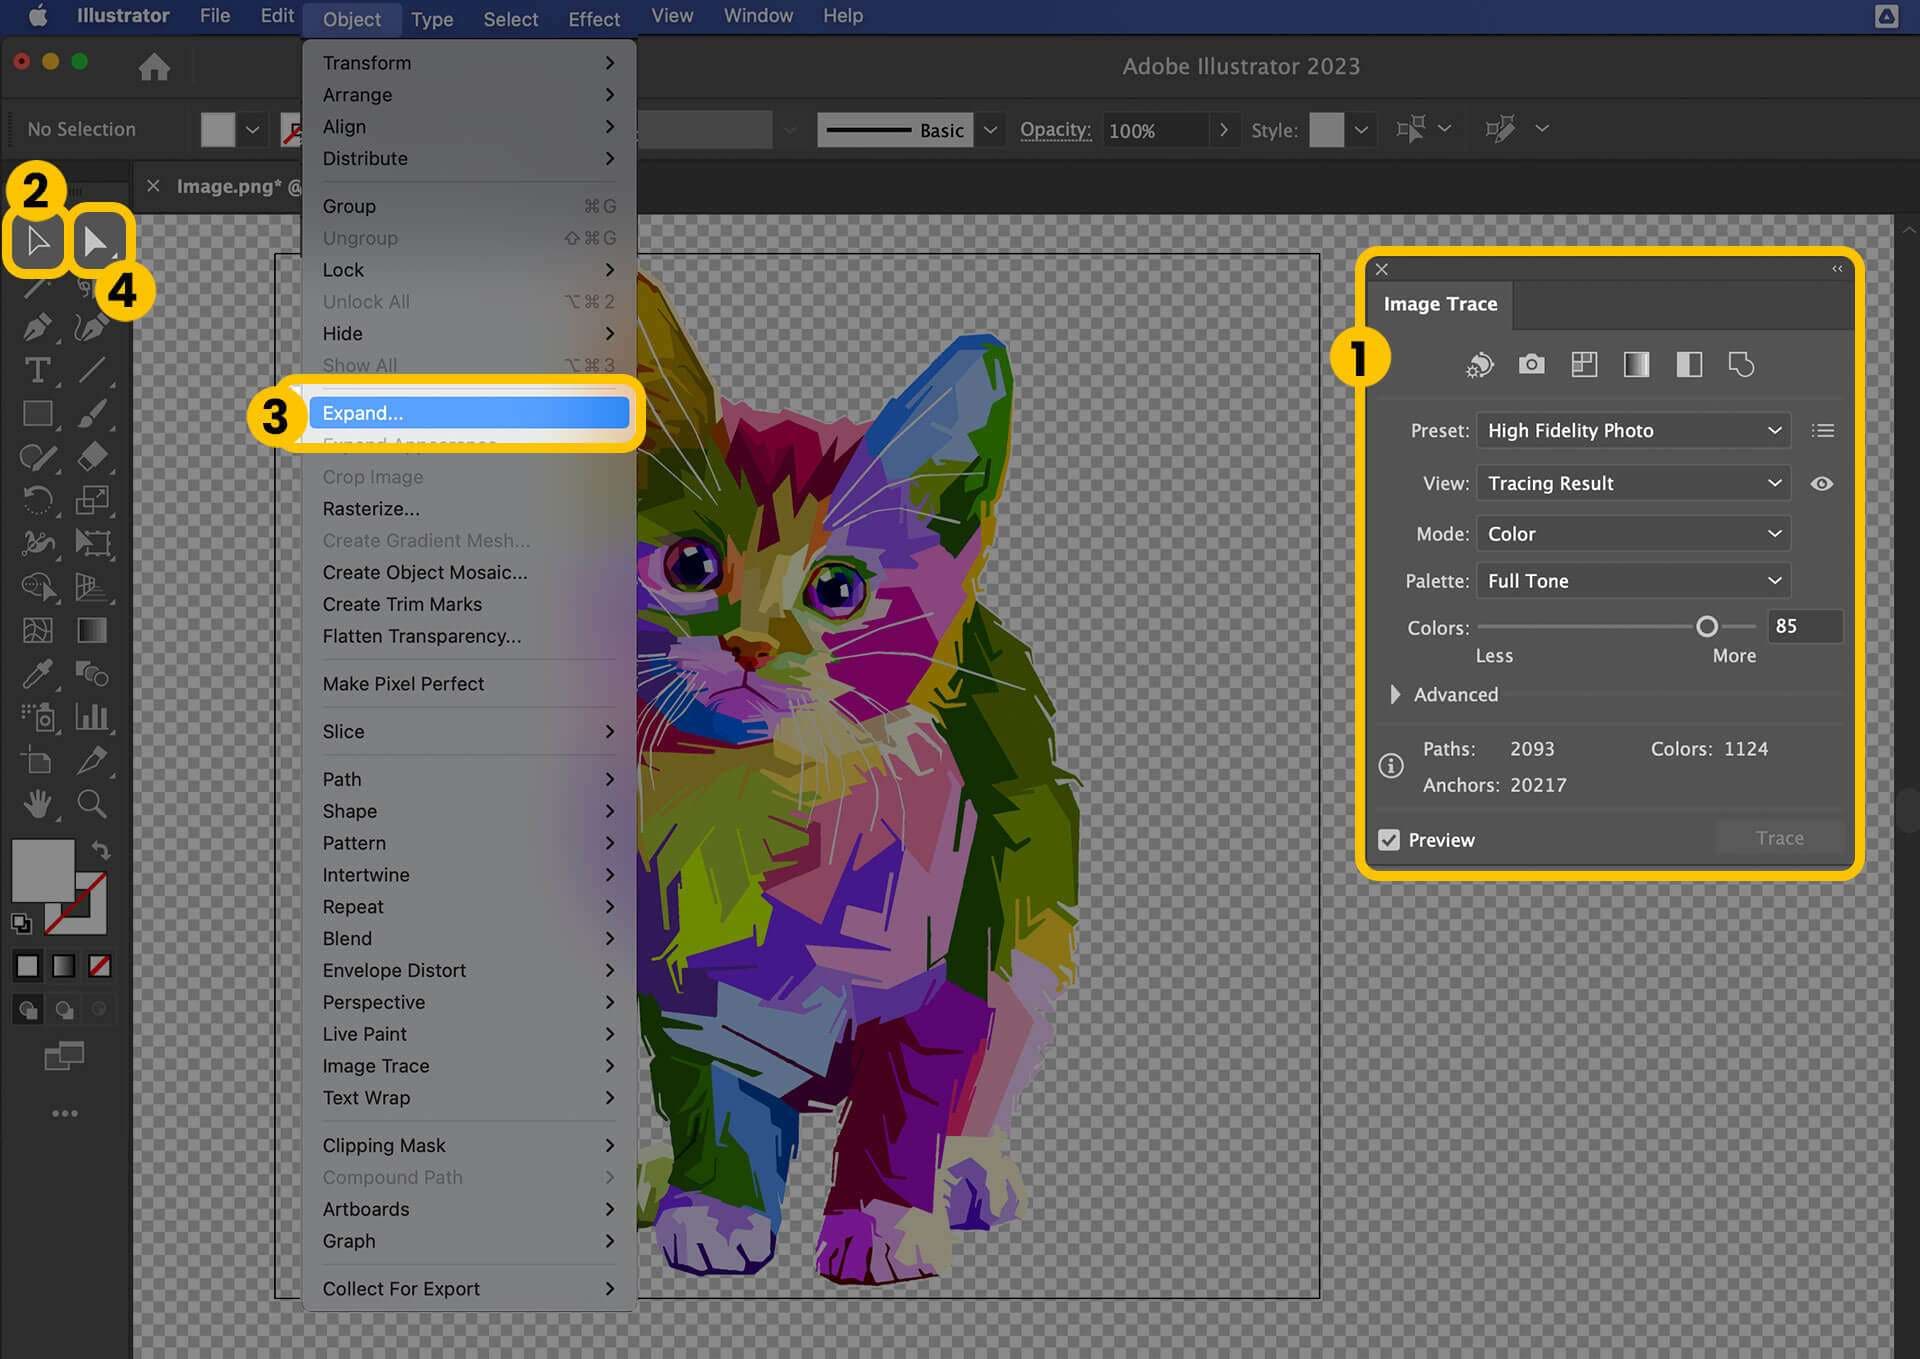
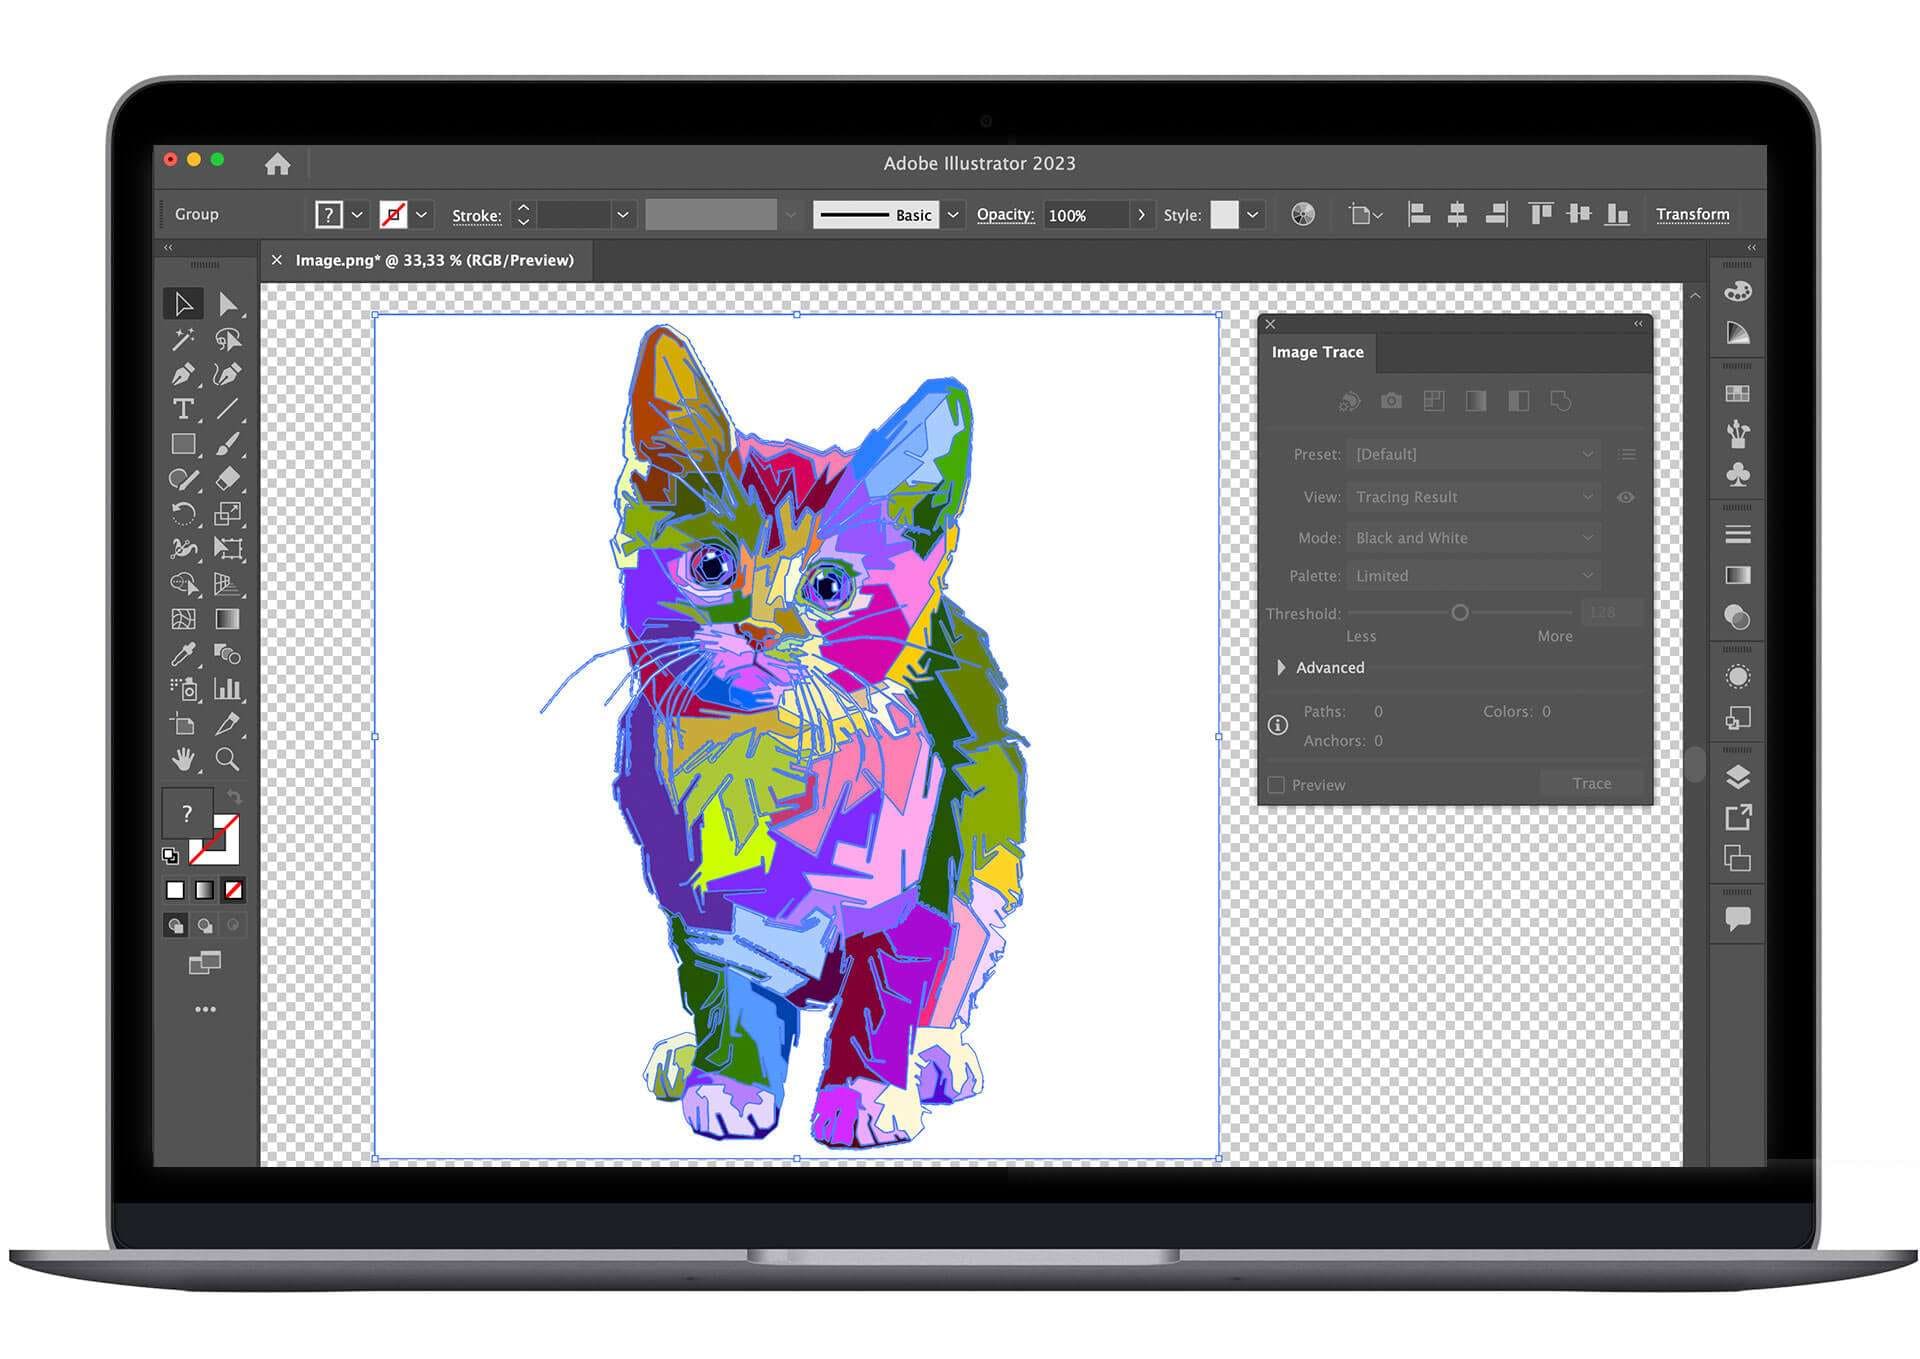
Image Trace allows you to remove a white background from any image. First, you create a vector, and then you remove a background. Here’s how to do it.
Step 1: Upload an image in Adobe Illustrator
Open Adobe Illustrator on your computer and open the image file by placing an image in the workspace. Reveal the checkerboard background by navigating to View>Show Transparency Grid. The checkerboard will indicate transparency in the background of your image.
Step 2: Open Image Trace
Run Image Trace by clicking the Window tab and selecting Image Trace from the dropdown menu. Locate the Selection tool in the toolbar (Black arrow) and click on it, then click on your image to select it.
Step 3: Select High Fidelity Photo
Select the High Fidelity Photo preset in the Image Trace window for the optimized results or any of the other presets that best suit the quality of your photo. Set Mode to the Color preset.
Step 4: Convert your image into a vector
The next step is to convert your image into a vector by navigating to Object>Expand.
Step 5: Remove the background
Locate Direct Selection in the toolbar (White arrow) and click on it. Select the background elements and parts you want to remove and click Delete.
Step 6: Export and save your file
Click the Object tab and select Expand to export your file as .EPS or PNG. Make sure you’ve ticked the Background Transparent box before exporting. Open File and click Save As to save your new image.


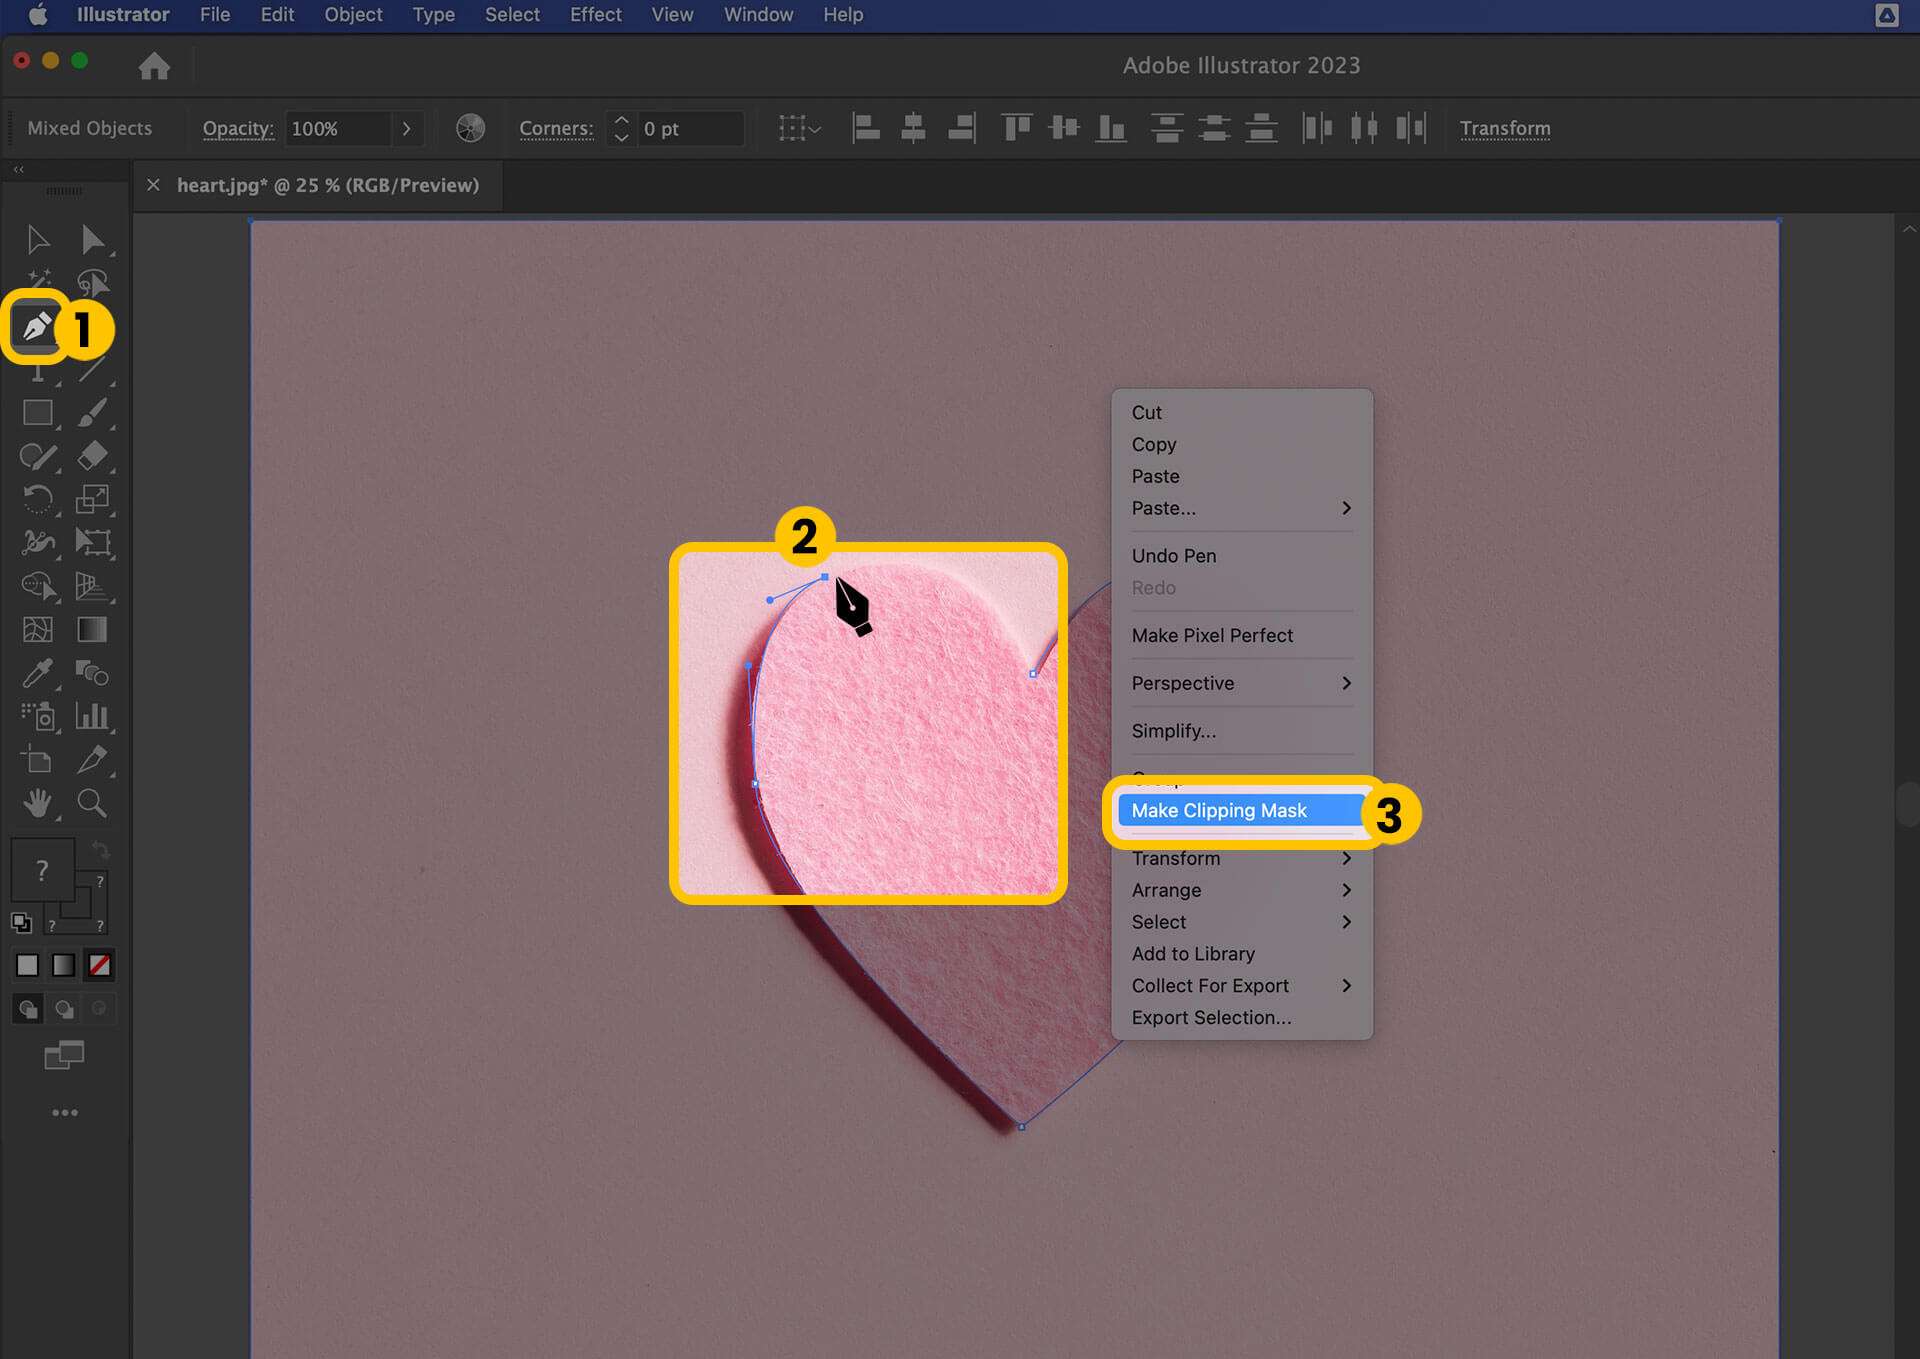
Adobe Illustrator also allows you to eliminate unwanted backgrounds using the Pen Tool with a clipping mask to mask or hide the background from the viewable range. Here are the steps to do it.
Step 1: Select the image
Open Adobe Illustrator and upload the image to the workspace. Select the Pen Tool in the toolbar to make your background selection.
Step 2: Open the Pen Tool
Once you open your image in Adobe Illustrator and zoom right in by selecting the zoom tool from the toolbar or by pressing Z. Open the Pen Tool and select your stroke color. Click No Fill and keep clicking around the image area to create anchor dots.
These dots create an image outline that you can manipulate. Once you’ve selected the image background outline, close up your shape by clicking on the first anchor point.
Step 3: Make a Clipping Mask
Press Shift and select both your outline and the whole image by clicking on them. Right-click on your selection and navigate to Make Clipping Mask. That will remove the background from your image.
Step 4: Make additional adjustments
You can edit your image further by using the Pen Tool or Direct Selection to add more anchor dots.
Step 5: View your changes
Check the transparency of your newly edited image by clicking View>Show Transparency Grid. That allows you to visualize the checkerboard background. If you’re satisfied with the result, proceed to the next step.
Step 6: Export and save your file
Check the Background Transparent box and navigate to Object>Expand. Export your image file as .EPS or PNG, then click File>Save As to save your image.
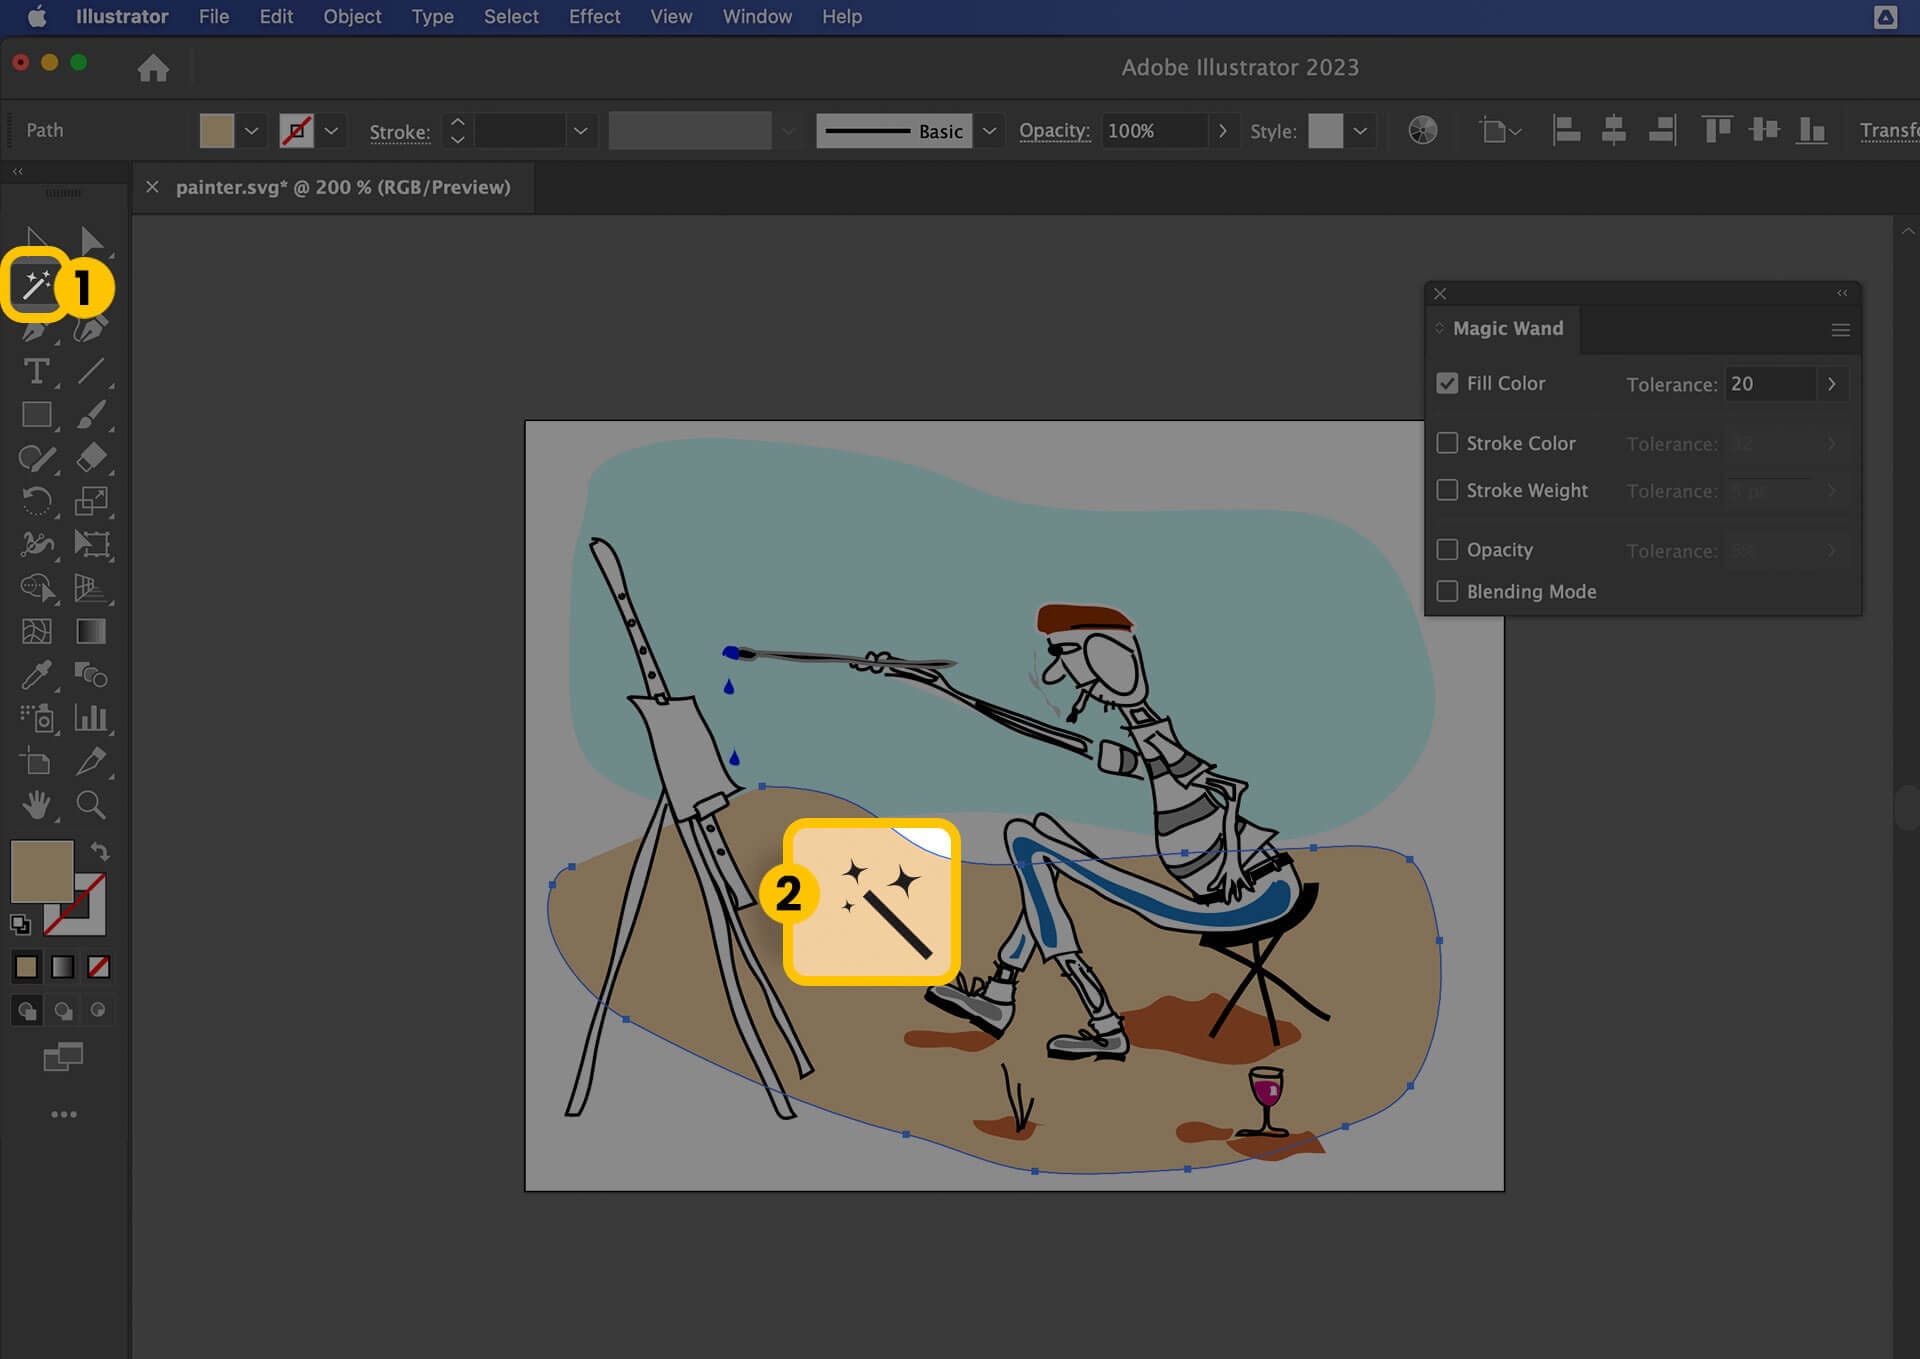
Magic Wand is an excellent tool for the job if you want to remove the background from a vector image. It allows you to select parts, sections, or entire objects that share similar characteristics and manipulate them according to your needs. Here’s how to use it to remove the background from an image.
Step 1: Upload an image to Adobe Illustrator
Open Adobe Illustrator on your computer and upload the image you want to remove the background from. Select the part of your image you want to remove and let Magic Wand identify matching elements.
If you need to add more elements to your selection, press and hold Shift and click on the part of the image you want to add.
Step 2: Customize the image settings
Customize your image settings using available options in the toolbar, such as stroke weight, opacity, or color.
Step 3: Remove the background
Once you’re done, click Delete to remove the selected background elements. Repeat as many times as needed until you accomplish satisfying results.
How to Remove Background and Create Perfect Images Using AI
AI image generators and photo editors can help you capture and generate amazing photos almost effortlessly. Most of these tools work in a simple way – you input a text prompt and let the AI turn it into an immersive image.
On the other hand, tools like Wondershare Virbo can wasily help you remove background and turn average photos into stunning, sharp, and clear images in mere minutes. It also allow you to quickly create high-end lifestyle images and product photos for both personal and business use.
All you have to do is upload a sample photo you want to enhance and let Wondershare Virbo work its magic. Wondershare Virbo is an AI-powered image editor that uses your existing images to generate enhanced versions of reference shots.
How to Remove Backgrounds from Portraits
Easily remove backgrounds and create unique images with these simple steps:
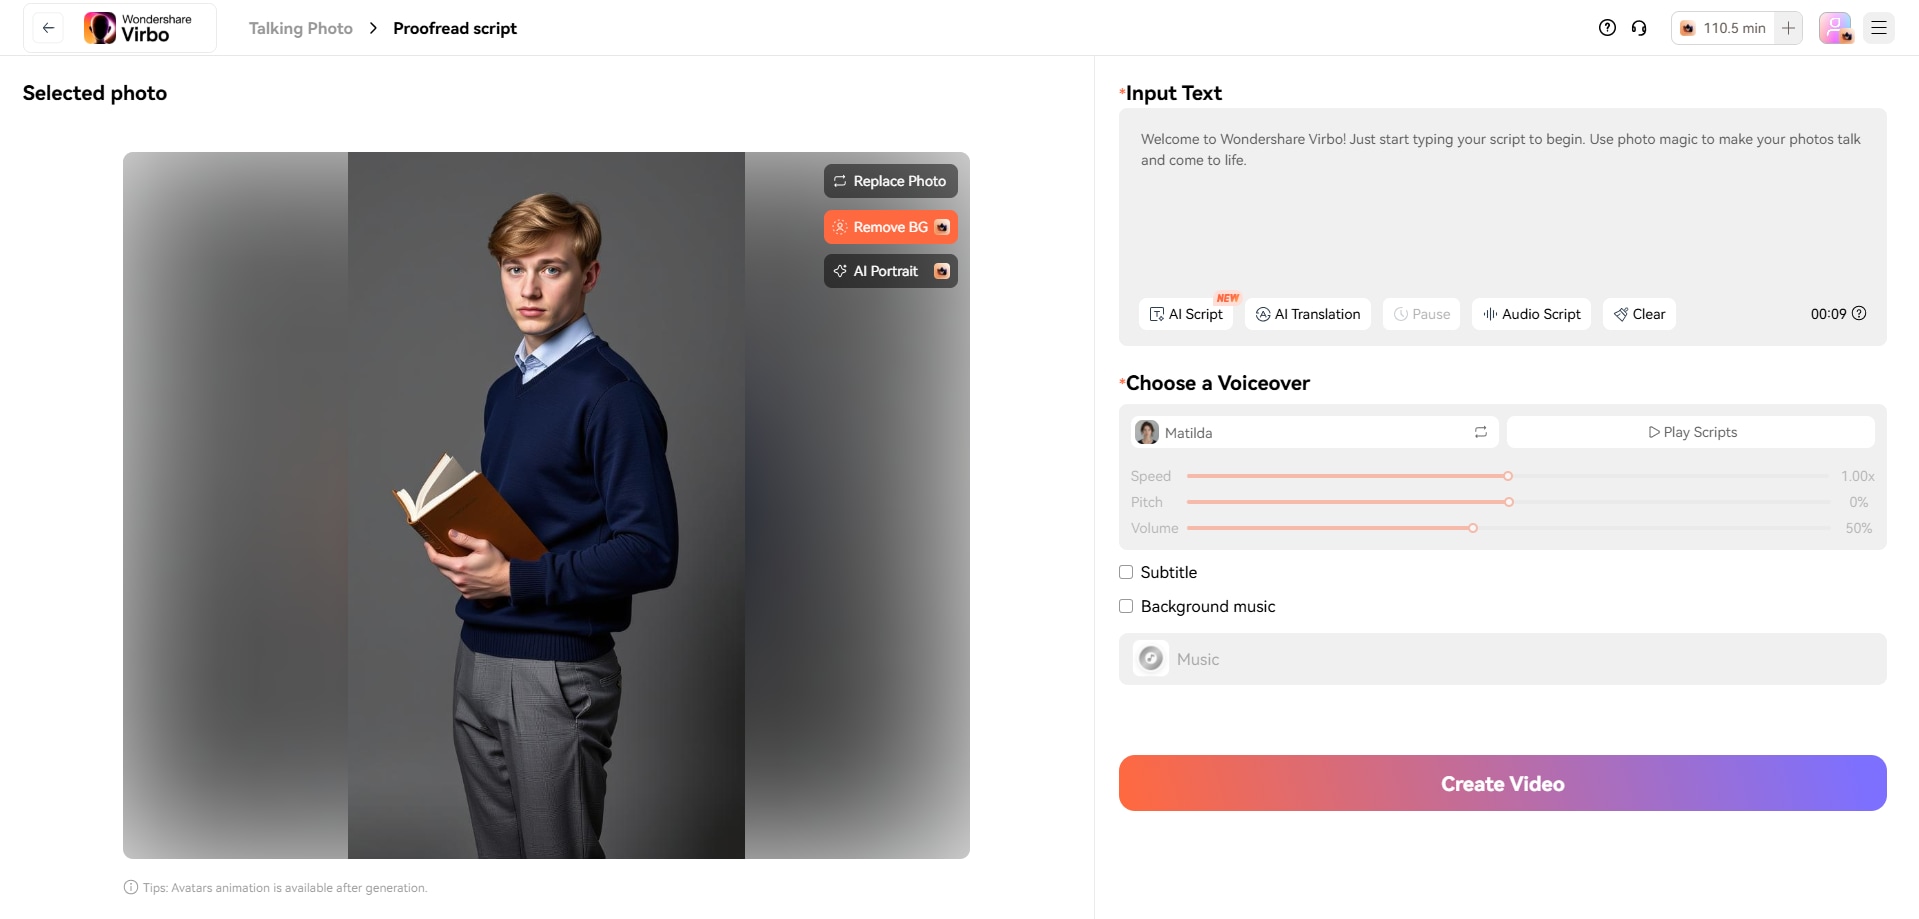
Step 1: Upload a Portrait Photo
Open Virbo in your browser, select the Talking Photo feature and upload the portrait image you want to edit.

Step 2: Remove the Background
Click the Remove BG button located at the top-right corner of the image. Our AI tool will automatically detect the subject and remove the background for you.
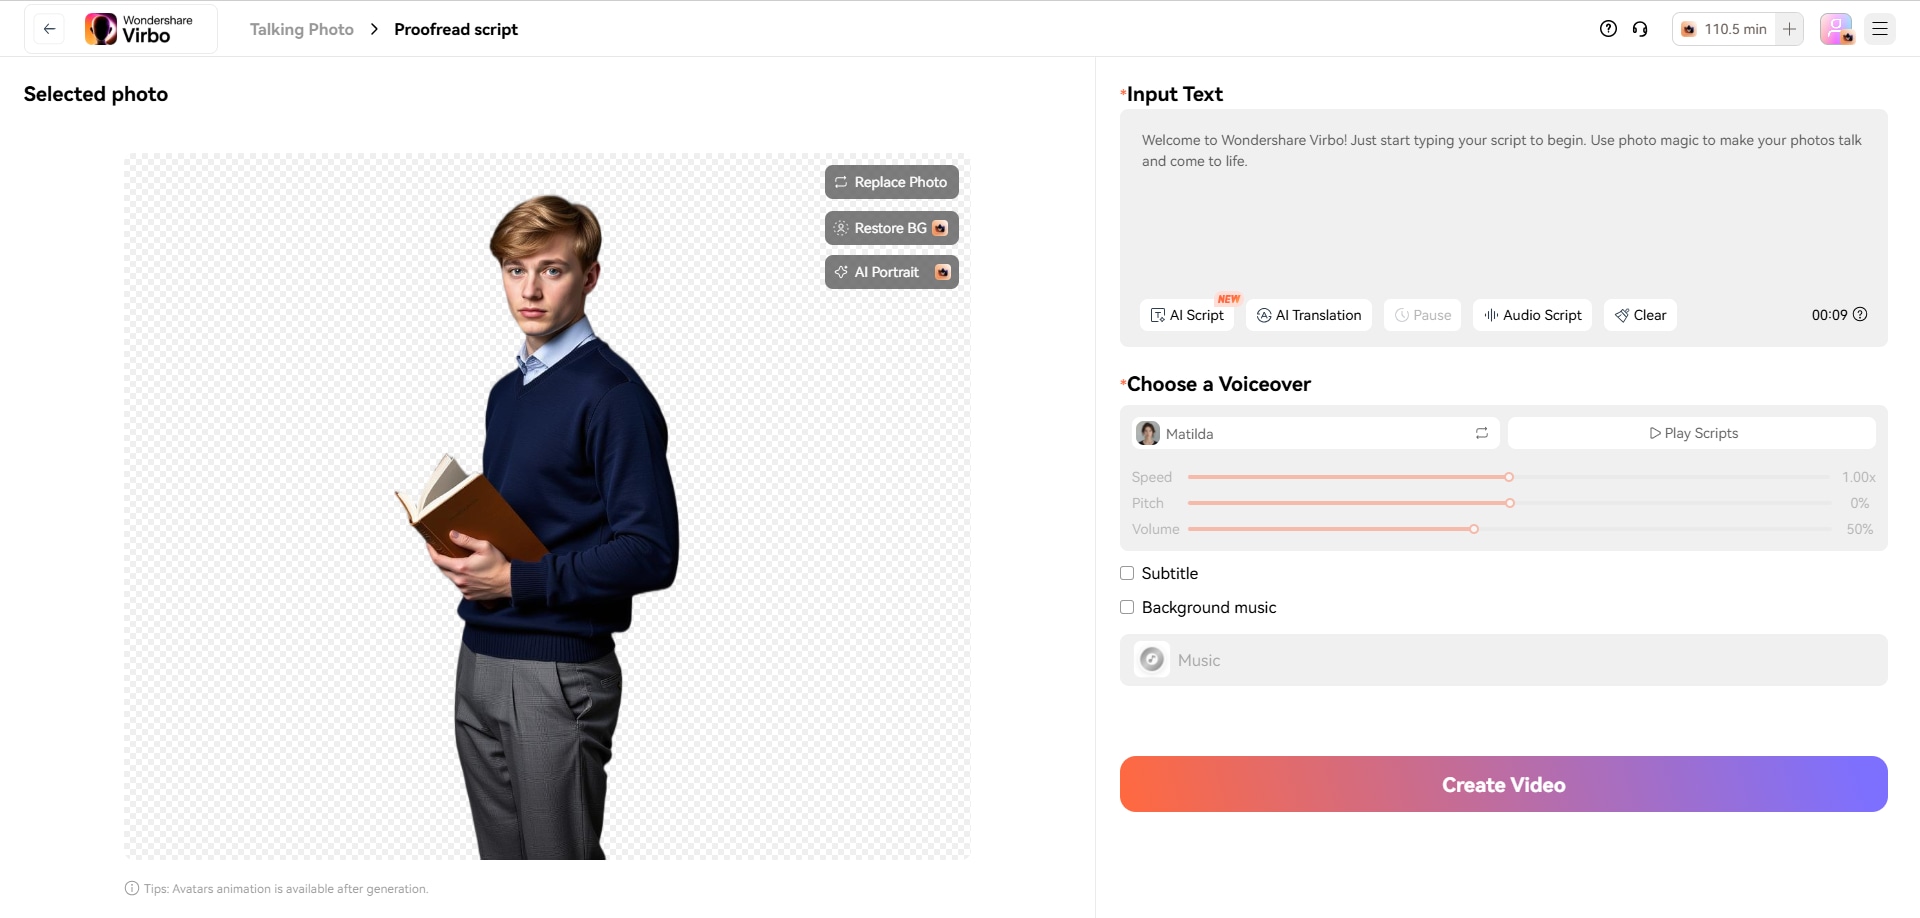
Step 3: Save the Edited Image
Right-click on the edited image and select Save image as... to download the portrait with the background removed to your device.
Create clean and professional images effortlessly! Try Virbo BG Remover Now
Conclusion
This guide has shared the best tips on how to remove background in Adobe Illustrator. These proven methods will help you manipulate your photos according to your specific needs.
Though there are other ways to eliminate the unwanted background, these are the easiest, most straightforward steps to make your photos transparent and save your image files in any format you prefer.